
>>

Luscious cream cheese filling piped into juicy strawberries for an elegant, no-bake party treat — quick to make and impossible to resist.
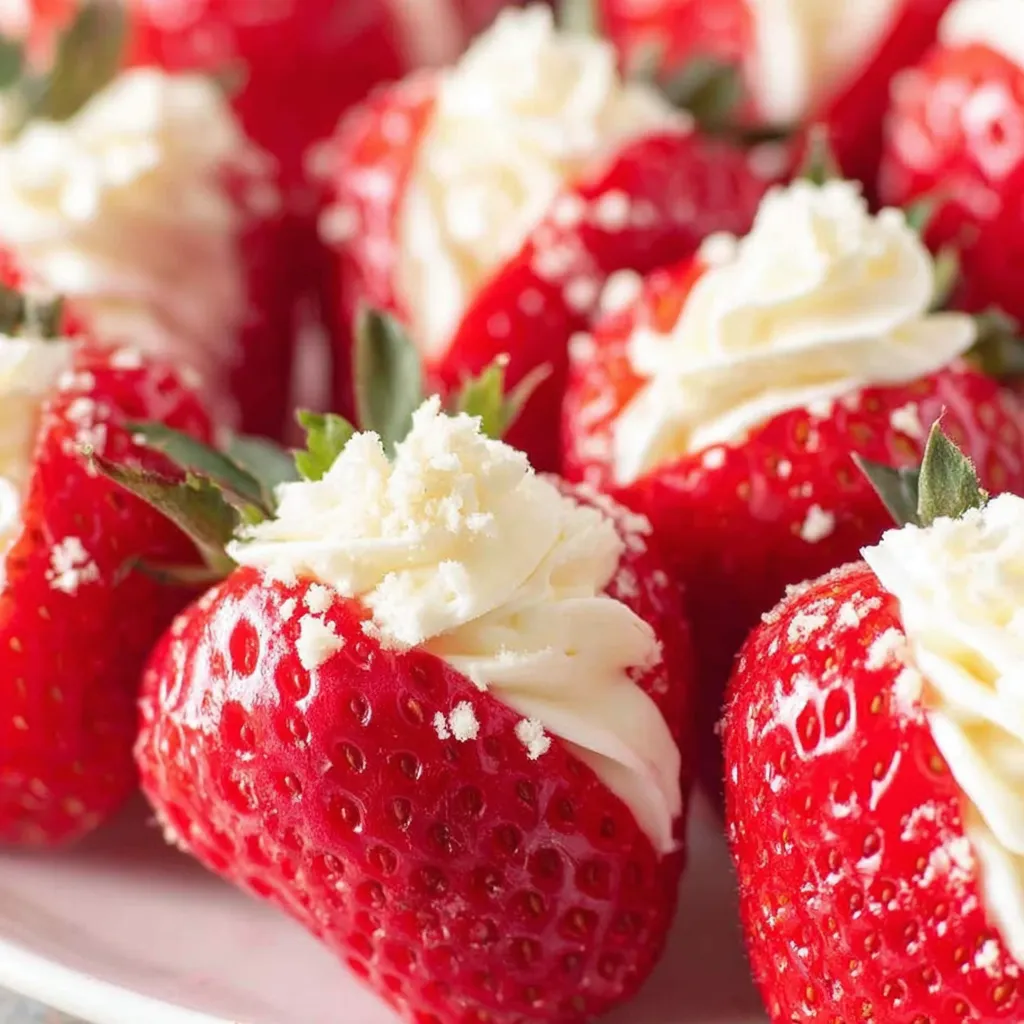
This simple, elegant dessert has been my go-to when I want something that feels special without hours in the kitchen. I first made these cheesecake stuffed strawberries for a summer brunch at my sister's house; we were short on oven time and I wanted a fresh, bright dessert that wouldn’t weigh everyone down. The result was a plate of glossy red strawberries cradling a tangy, sweet cream cheese filling — people kept reaching back for more. The contrast between the slightly tart berry and the velvety filling is what makes these truly memorable.
I discovered the filling ratio after a few experiments: 8 ounces of cream cheese gives the base creaminess, powdered sugar provides sweetness without graininess, and a touch of sour cream lightens the texture so the filling pipes beautifully. These are perfect for holidays, bridal showers, backyard barbecues, or a weekday treat when you want something quick and pretty. Because they’re no-bake, they come together fast and travel well in a chilled container — making them ideal for entertaining or impromptu gatherings on Cravele.
I still remember when my niece declared these the best thing she’d ever had at a family party and asked for seconds before finishing her first. Since then I’ve made them for school events, date nights, and holiday desserts, and they always disappear within minutes. The first time I sprinkled graham cracker crumbs on top, the extra crunch elevated the texture and turned a simple treat into a signature moment.
My favorite thing about this treat is how quickly it transforms simple ingredients into something that looks like it came from a pastry case. I once brought a tray to a neighborhood bake sale and the box was empty within 20 minutes — strangers kept asking for the recipe. The combination of sweet, tangy, creamy, and crunchy hits all the right points, and the visual appeal makes guests feel pampered even if the prep was straightforward.
To maintain texture, store assembled pieces in a single layer in an airtight container lined with parchment paper and keep chilled. They will keep for up to 24 hours; beyond that the filling will increasingly soften and the berries will release more juice. If you need to make the filling ahead, keep it refrigerated in an airtight container for up to 48 hours — whisk briefly before piping to restore loft. Avoid freezing assembled berries as thawing will ruin the texture of both fruit and filling.
For a lighter version, swap half of the cream cheese for mascarpone or use reduced-fat cream cheese and low-fat sour cream; the texture will be a touch less rich but still pipeable. To make it dairy-free, use a firm dairy-free cream cheese alternative and a vegan sour cream; flavor and mouthfeel will differ slightly, so test the sweetness. Replace powdered sugar with coconut sugar powder for a different flavor profile and use crushed gluten-free cookies in place of graham crackers if needed.
Arrange the pieces on a bed of mint leaves or edible flowers for a spring celebration, or present them on a slate board dusted lightly with powdered sugar for a dinner party. Serve alongside a small cup of espresso or a sparkling rosé for contrast. For a kid-friendly platter, add a bowl of rainbow sprinkles or mini chocolate chips for dipping so guests can personalize each piece.
Stuffed fruit is a classic concept found in many culinary traditions where fresh produce is paired with creamy or nutty fillings. These particular berries borrow the flavor profile of American-style cheesecake — cream cheese, graham cracker crumbs, and vanilla — condensed into a single-bite presentation. This no-bake approach modernizes traditional cheesecake into a lighter, portable dessert that gained popularity in catering and party menus for its ease and visual appeal.
In summer, choose the ripest berries and add a splash of lemon zest to the filling for extra brightness. For winter holidays, fold in a pinch of cinnamon or swap graham crumbs for crushed ginger snaps to warm the spice profile. In spring, top with a thin slice of macerated strawberry or a single raspberries to create a layered berry presentation that celebrates peak fruit season.
If preparing for a party, wash and dry the berries the morning of the event and keep them refrigerated until filling time. Make the filling the night before and chill in an airtight container; when ready, bring to a slightly soft but chilled consistency and pipe. Transport filled pieces in a shallow cooler with ice packs and place the container on the coolest part of your car to keep them fresh until serving.
These cheesecake stuffed strawberries are a delightful, low-effort way to end a meal or elevate a casual gathering. They combine the nostalgia of cheesecake with the freshness of berries, and once you master the filling texture, the assembly becomes second nature. Give them a try for your next get-together and watch how fast they disappear.
Soften the block cream cheese to room temperature for 20–30 minutes to avoid lumps when beating.
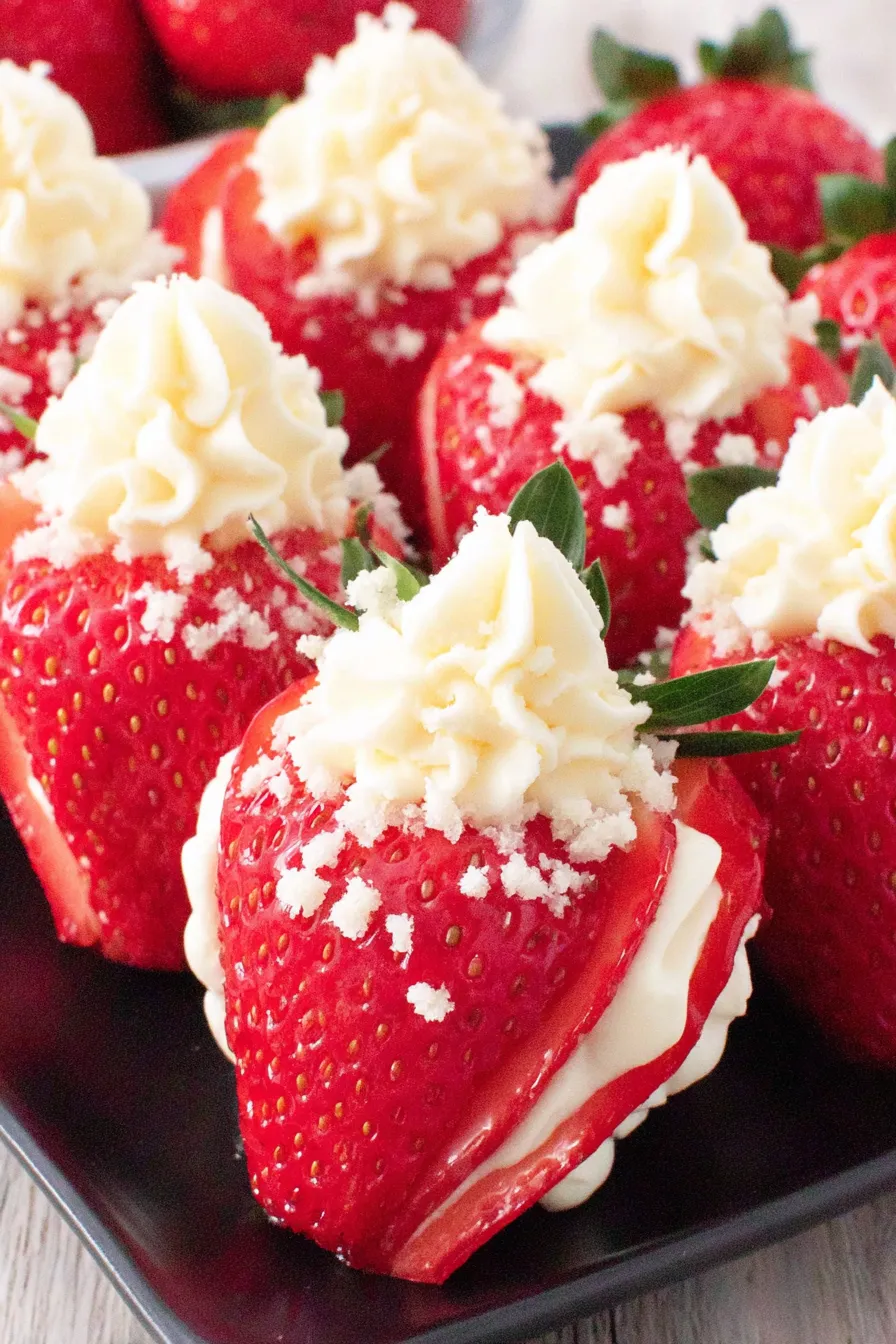
Pipe the filling with a star tip for a bakery-style rosette; use a round tip for a smoother look.
Assemble no more than 1–2 hours before serving to prevent the filling from weeping or running.
If filling becomes too soft while piping, chill the mixture for 10–15 minutes to firm up.
This nourishing cheesecake stuffed strawberries recipe is sure to be a staple in your kitchen. Enjoy every moist, high protein slice — it is perfect for breakfast or as a wholesome snack any time.
This Cheesecake Stuffed Strawberries recipe makes perfectly juicy, tender, and flavorful steak every time! Serve with potatoes and a side salad for an unforgettable dinner in under 30 minutes.
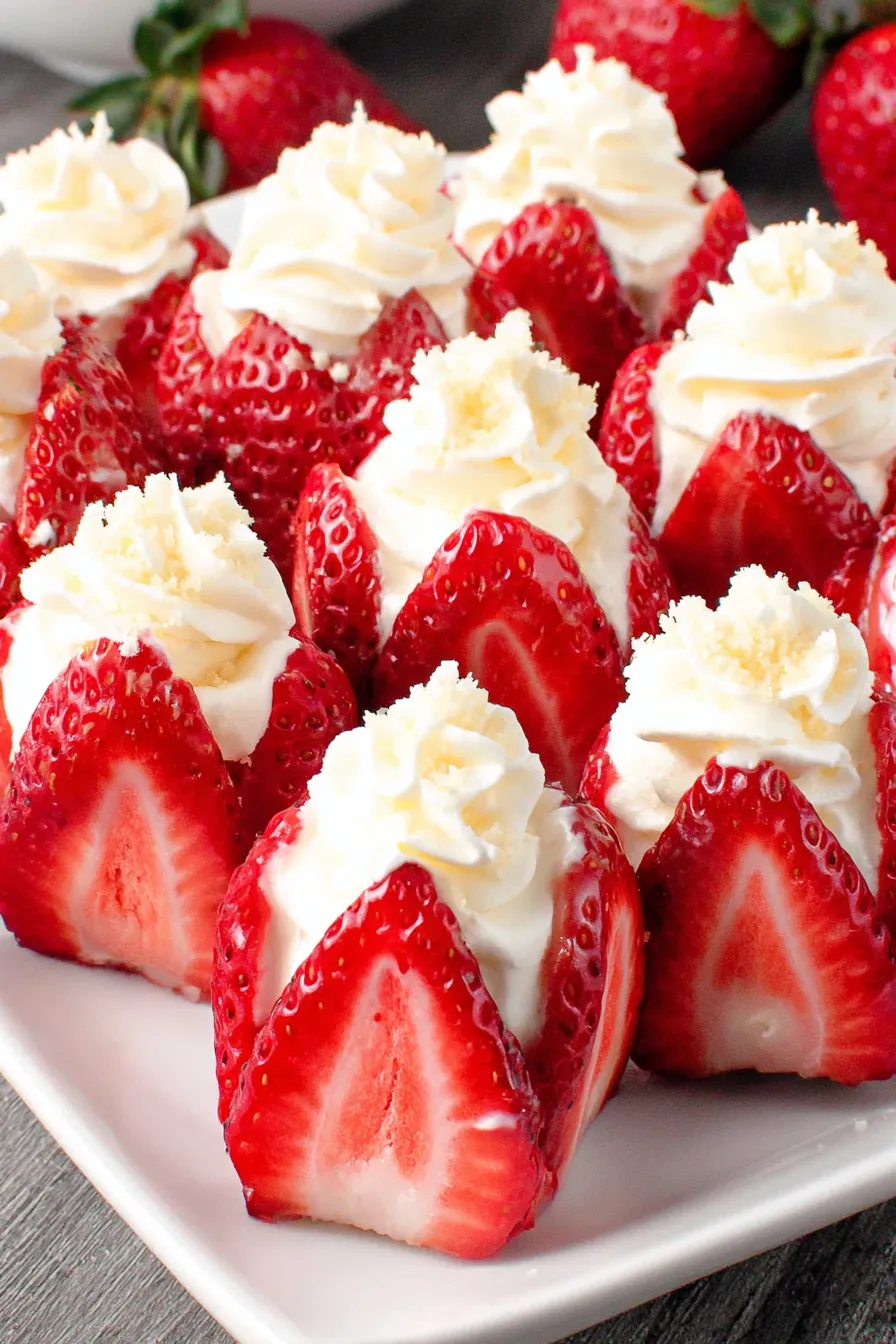
Wash and dry the strawberries completely. Trim the leaf side so each berry sits flat on a platter, leaving the green top for presentation.
Using a sharp paring knife, cut each strawberry into six vertical sections about 3/4 of the way through. Do not cut all the way; keep the base intact so the berry remains anchored while piping.
Beat the softened cream cheese on high until smooth, then add powdered sugar, sour cream, and vanilla. Beat until silky and slightly glossy, scraping down the bowl to ensure even mixing.
Transfer the filling to a piping bag fitted with a star or round tip. Pipe a small rosette into the center of each scored berry, filling until slightly mounded but not overflowing.
Sprinkle graham cracker crumbs or chopped nuts on top if desired. Chill the assembled pieces for 15–30 minutes before serving to let the filling set.
Serve within 1–2 hours of assembling for best texture. Keep chilled during transport in a single layer to avoid smudging the tops.
Last Step: Please leave a rating and comment letting us know how you liked this recipe! This helps our business to thrive and continue providing free, high-quality recipes for you.
Leave a comment & rating below or tag
@cravele on social media!

Ultra-fudgy brownies studded with chocolate chunks, crowned with gooey marshmallows and a quick cocoa icing for irresistible, crowd-pleasing decadence.

Buttery shortbread crust topped with a gooey brown sugar pecan filling. Easy, crunchy, and truly irresistible with just 10 minutes of prep.

Silky pumpkin cheesecake with a spiced graham crust, no cracks, effortless mixing, and decadent caramel and rum whipped cream for unforgettable holiday celebrations.
Leave a comment & rating below or tag @cravele on social media!
Enjoyed this recipe? Share it with friends and family, and don't forget to leave a review!
This recipe looks amazing! Can't wait to try it.
Comments are stored locally in your browser. Server comments are displayed alongside your local comments.

Join to receive our email series which contains a round-up of some of our quick and easy family favorite recipes.
