
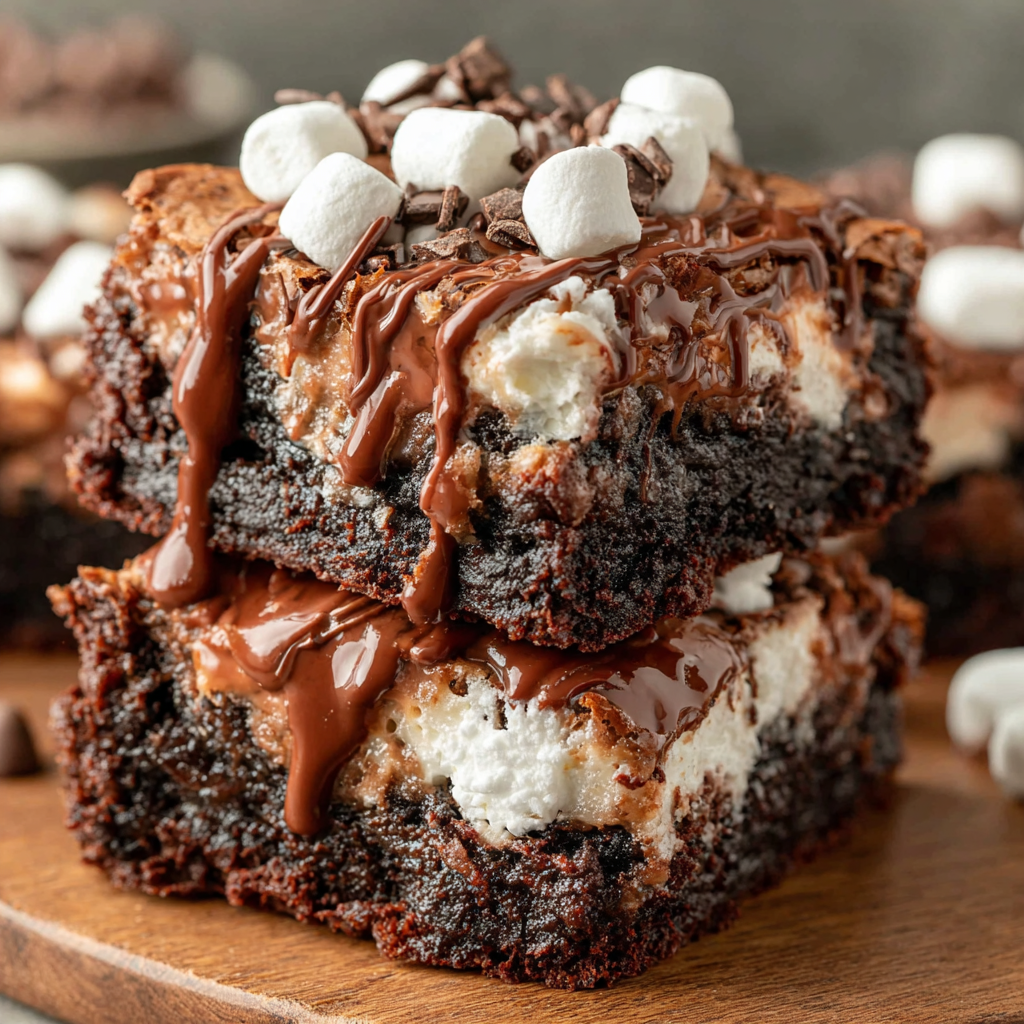
Fudgy Marshmallow Brownies

Ultra-fudgy brownies studded with chocolate chunks, crowned with gooey marshmallows and a quick cocoa icing for irresistible, crowd-pleasing decadence.

Why You'll Love This Recipe
- Deep, fudgy texture from a butter-sugar emulsion and Dutch-process cocoa, ready from start to finish in about 50 minutes.
- Simple pantry staples: butter, sugar, cocoa, flour, eggs, and vanilla—plus mini marshmallows for the signature gooey topping.
- Chocolate in every bite thanks to folded-in chunks and more scattered on top, creating melty pockets throughout.
- Foolproof marshmallow layer that bakes for a few minutes to adhere properly, so the topping never slides off when slicing.
- Quick stovetop cocoa icing pours on smoothly and sets into a soft, sliceable finish that travels well for parties.
- Make-ahead friendly: bakes in a standard 9×13-inch metal pan and cuts cleanly once fully set for easy serving.
Each time I make these, I’m reminded of bake-sale classics and childhood campfire treats rolled into one. My family always asks if I can “make the marshmallow brownies” for birthdays because they feel festive without any fussy decorating. The icing shines like a glaze and makes every piece look bakery-special.
Ingredients
- Unsalted butter: Choose a high-fat butter for the richest flavor and glossy tops. I love Kerrygold for its deep, creamy taste and consistent melt.
- Granulated sugar: Domino sugar melts smoothly into the butter to create that essential shiny, crackly crust and fudgy interior.
- Canola oil: A touch of neutral oil keeps the crumb ultra-moist without distracting from the chocolate. Any mild vegetable oil works.
- Vanilla extract: Real vanilla rounds out the cocoa’s bitterness. Look for pure vanilla, not imitation, for best depth.
- Large eggs: Vital Farms or similar high-quality eggs provide structure and richness. Room-temperature eggs incorporate more evenly.
- All-purpose flour: King Arthur yields reliable results. Keep the measure light to preserve fudginess; do not pack the cup.
- Dutch-process cocoa powder: Ghirardelli Dutch-process offers smooth, deep chocolate flavor and a darker hue than natural cocoa.
- Salt: Balances sweetness and sharpens chocolate notes. Fine sea salt disperses easily for even seasoning.
- Chocolate chunks: Dark or milk; thicker bars (Trader Joe’s Pound Plus) create penny-sized pockets that melt luxuriously.
- Mini marshmallows: The small size melts and adheres evenly, forming a cohesive layer that supports the icing.
- Salted butter (for icing): Adds a gentle salty finish that keeps the icing from tasting flat or overly sweet.
- Powdered sugar: Sifts into the icing for a smooth, pourable texture that sets into a soft glaze.
- Unsweetened cocoa powder (for icing): Boosts chocolate flavor and tints the icing a shiny, bakery-style brown.
- Whole milk: Thins the icing to the perfect pour; whole milk adds body while keeping the finish soft.
- Vanilla extract (for icing): Enhances chocolate notes and rounds the icing’s flavor so it complements the marshmallow layer.
Instructions
Prep the pan and oven: Preheat the oven to 350°F. Line a metal 9×13-inch pan with two crisscrossed sheets of parchment, allowing overhang for easy lifting, and mist lightly with cooking spray. Place the shorter sheet beneath the longer so batter cannot creep under the full-length liner. Emulsify butter and sugar: Melt the butter in a heavy-bottomed saucepan over low heat. Stir in granulated sugar until the mixture looks glossy and unified, with no butter pooling. Remove from heat and stir for about 5 minutes to cool slightly; the mixture should thicken and lose visible steam. Add oil, vanilla, and eggs: Stir in canola oil and vanilla until fully incorporated and no oily sheen remains on top. Beat in eggs one at a time, mixing thoroughly after each addition. The batter should look thick, smooth, and homogenous with a faint sheen. Sift and fold the dry mix: Sift flour, Dutch-process cocoa, and salt directly over the pot. Gently fold with a rubber spatula just until dry streaks disappear. Avoid overmixing to retain fudginess and prevent a cakey texture. Add chocolate and bake: Fold in most of the chocolate chunks, reserving a small handful. Spread the batter into the prepared pan, scatter remaining chunks on top, and bake for 25 minutes. The surface should look set and slightly shiny at the edges. Marshmallow layer: Remove the pan, evenly sprinkle mini marshmallows over the hot brownies, and return to the oven for 3 minutes. The marshmallows should puff slightly and just start to look sticky and fused. Make the icing and finish: In a saucepan over medium heat, melt salted butter. Whisk in sifted powdered sugar and cocoa until smooth. Whisk in milk and vanilla until glossy and pourable. Remove from heat and immediately pour over the marshmallows, coaxing gently with a spatula to cover. Let set fully before lifting from the pan and slicing.
You Must Know
- Let brownies cool until the icing is set for the cleanest slices.
- Use a plastic knife or a greased metal knife to prevent marshmallow sticking.
- Brownies keep 3 to 4 days covered at room temperature; the marshmallow stays soft.
- These travel well once fully set and are perfect for potlucks and bake sales.
- For extra chocolate impact, use dark chocolate chunks inside and milk chocolate on top.
My favorite part is the moment the warm icing meets the marshmallow layer. It slides into tiny valleys and creates a marbled, glossy surface that looks like a fancy bakery treat with zero decorating stress. A cousin once requested these instead of birthday cake, and we passed around napkins and laughed at the telltale marshmallow strings that prove you did it right.
Storage Tips
Once the icing has fully set, cover the pan tightly with foil or transfer squares to an airtight container with parchment between layers. Keep at room temperature up to 4 days. For longer storage, refrigerate up to 1 week; bring to room temperature before serving for the best fudgy texture. These brownies also freeze beautifully: wrap the entire slab or individual squares in plastic, then foil, and freeze for up to 3 months. Thaw overnight in the refrigerator or at room temperature for 2 to 3 hours. To refresh the texture, unwrap and let sit at room temp for 20 minutes. Avoid microwaving the marshmallow layer; it can expand unevenly and become sticky.
Ingredient Substitutions
If you only have natural cocoa, you can swap it for Dutch-process, but expect a lighter color and slightly sharper cocoa flavor. Use the same amount by volume. Vegetable oil can stand in for canola. If you prefer semisweet chocolate, use it 1:1 for the chunks; a mix of dark and milk offers the most balanced bite. No mini marshmallows? Cut standard marshmallows into quarters and fluff them with a dusting of powdered sugar before scattering so they don’t clump. For a saltier finish, replace half the unsalted butter in the batter with salted and reduce the added salt by a pinch. Gluten-free baking flour blends vary; if trying one, choose a cup-for-cup blend with xanthan gum and avoid overmixing to maintain structure.
Serving Suggestions
Serve these squares slightly chilled for the neatest edges or at room temperature for the ooziest marshmallow pull. Add a scoop of vanilla ice cream if you want the full sundae effect. For a party platter, cut into bite-sized pieces and garnish with a few chocolate curls or a light dusting of cocoa. A drizzle of warm caramel or a sprinkle of flaky sea salt turns them into an elevated dessert bar. They pair beautifully with espresso or cold brew to balance the sweetness, and fresh berries on the side add a bright, tart contrast.
Cultural Background
These brownies channel the spirit of classic American bake-sale treats and Southern-inspired mud bars, where a marshmallow layer meets a cocoa glaze. The technique of pouring warm frosting over a hot or warm base dates back decades in church cookbooks and family reunions because it creates a glossy finish without fuss. The result feels like a mash-up of a campfire s’more and a candy-shop fudge slice, with textures designed for sharing and nostalgia baked in.
Seasonal Adaptations
In winter, fold in peppermint chips with the chocolate and finish with a pinch of crushed peppermint on the icing. Spring calls for a handful of chopped toasted almonds or hazelnuts sprinkled over the marshmallow layer before icing for a rocky road vibe. In summer, swirl 2 to 3 tablespoons of raspberry jam into the batter before baking for fruity ribbons. For fall gatherings, add 1 teaspoon of espresso powder to the batter and finish with a dusting of cinnamon on the cooled icing. Each tweak stays true to the fudgy base while playing up seasonal cravings.
Meal Prep Tips
If you’re baking ahead for an event, make the brownies the day before and let them set completely overnight at room temperature. Slice with a plastic knife, then store between parchment layers in a lidded container. For clean edges, wipe the knife between cuts. You can also bake, cool, and freeze the uncut slab; slice after thawing for the sharpest lines. If transporting, keep the pan intact and cut on-site to avoid smudging. Pack napkins—those marshmallow strings are part of the fun.
Most of all, enjoy the moment when the first square is lifted from the pan and the marshmallow stretches into a glossy ribbon. This is the kind of bake that earns requests and starts traditions—simple ingredients, big smiles, and a little kitchen magic.
Pro Tips
Beat in eggs one at a time for a glossy, unified batter that bakes evenly.
Sift cocoa and powdered sugar to prevent lumps in both batter and icing.
Bake marshmallows for a short 3 minutes so they adhere without overbrowning.
Pour icing immediately after whisking; it sets quickly on the warm marshmallows.
Use a plastic knife or a greased blade for the cleanest slices.
This nourishing fudgy marshmallow brownies recipe is sure to be a staple in your kitchen. Enjoy every moist, high protein slice — it is perfect for breakfast or as a wholesome snack any time.
FAQs about Recipes
Can I use regular marshmallows instead of mini?
Yes. For best results, replace mini marshmallows with standard marshmallows cut into quarters. Toss pieces with a little powdered sugar so they don’t clump, then bake the marshmallow layer for the same 3 minutes to help it adhere.
Why a metal pan instead of glass?
A metal 9×13-inch pan conducts heat quickly and promotes the classic shiny top and fudgy center. Glass bakes slower and can overcook the edges before the center sets, so if using glass, add a few minutes and watch closely.
Do these brownies travel well?
Once the icing has set completely, they slice cleanly and hold their shape for travel. Keep them at cool room temperature, in a covered container, and avoid stacking more than two layers with parchment between.
Can I freeze these brownies?
Yes. Wrap the whole slab or individual squares tightly and freeze up to 3 months. Thaw at room temperature or in the fridge. Avoid microwaving, which can over-melt the marshmallow layer.
How do I avoid cakey brownies?
Fold just until the dry streaks are gone. Overmixing develops gluten and can create a cakier texture. A gentle hand keeps the brownies fudgy.
Tags
Fudgy Marshmallow Brownies
This Fudgy Marshmallow Brownies recipe makes perfectly juicy, tender, and flavorful steak every time! Serve with potatoes and a side salad for an unforgettable dinner in under 30 minutes.
Ingredients
Brownies
Topping
Instructions
Prep pan and oven
Preheat to 350°F. Line a 9×13-inch metal pan with two crossing sheets of parchment, leaving overhang. Lightly spray with cooking spray.
Emulsify butter and sugar
Melt butter over low heat. Stir in granulated sugar until thick, glossy, and unified with no butter pooling. Remove from heat and stir for 5 minutes to cool slightly.
Add oil, vanilla, and eggs
Stir in canola oil and vanilla until fully combined. Beat in eggs one at a time, mixing well after each addition until smooth and shiny.
Fold in dry ingredients
Sift flour, Dutch-process cocoa, and salt over the mixture. Fold gently just until no dry streaks remain to keep the texture fudgy.
Add chocolate and bake
Fold in most chocolate chunks, reserve a handful. Spread batter in pan, scatter remaining chocolate on top, and bake 25 minutes.
Add marshmallows
Remove pan, evenly sprinkle mini marshmallows over hot brownies, and return to oven for 3 minutes to puff and adhere.
Make icing and finish
In a saucepan, melt salted butter. Whisk in powdered sugar and cocoa, then milk and vanilla until glossy. Immediately pour over marshmallows, spread gently, and let set before slicing.
Last Step: Please leave a rating and comment letting us know how you liked this recipe! This helps our business to thrive and continue providing free, high-quality recipes for you.
Nutrition
Did You Make This?
Leave a comment & rating below or tag
@cravele on social media!
Categories:
You might also like...
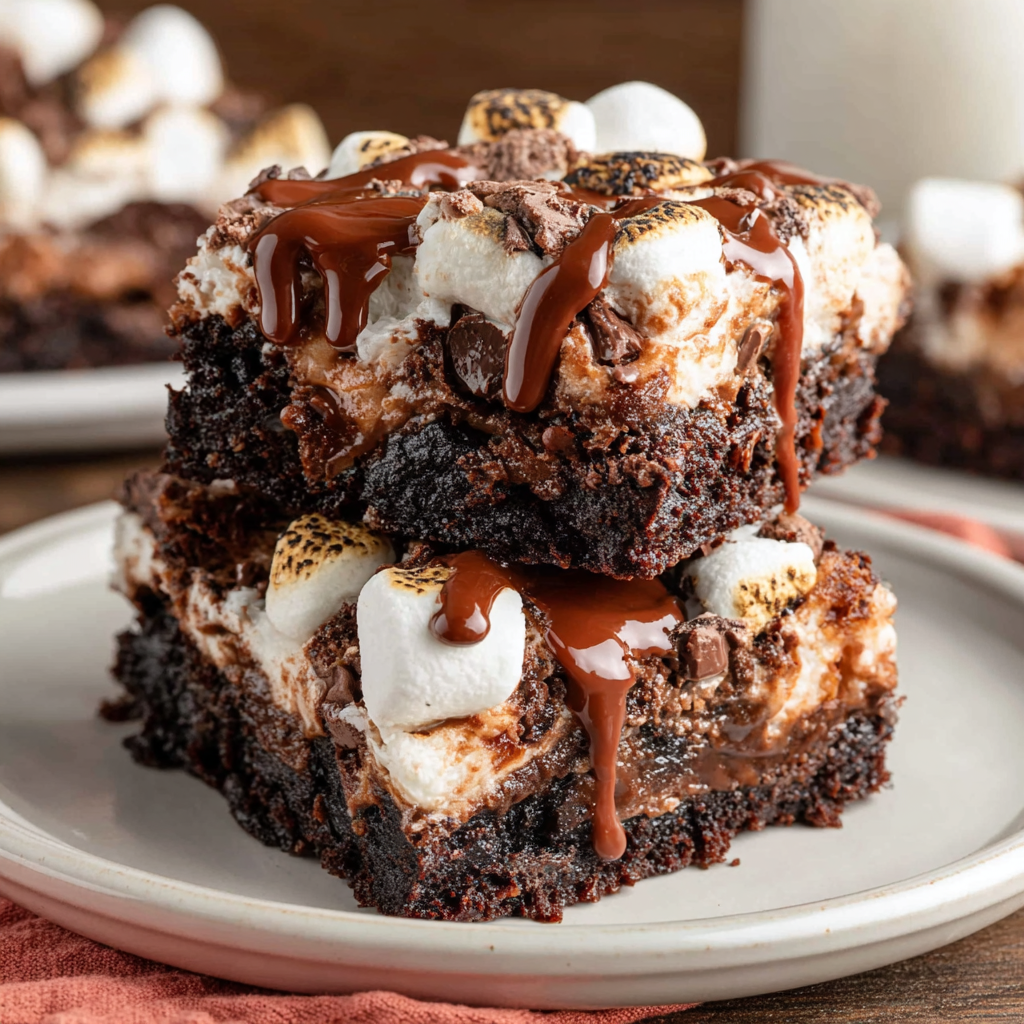
Fudgy Marshmallow Brownies
Ultra-fudgy brownies studded with chocolate chunks, crowned with gooey marshmallows and a quick cocoa icing for irresistible, crowd-pleasing decadence.

Buttery Pecan Pie Bars
Buttery shortbread crust topped with a gooey brown sugar pecan filling. Easy, crunchy, and truly irresistible with just 10 minutes of prep.

Silky No-Crack Pumpkin Cheesecake
Silky pumpkin cheesecake with a spiced graham crust, no cracks, effortless mixing, and decadent caramel and rum whipped cream for unforgettable holiday celebrations.
Did You Make This?
Leave a comment & rating below or tag @cravele on social media!
Rate This Recipe
Share This Recipe
Enjoyed this recipe? Share it with friends and family, and don't forget to leave a review!
Comments (1)
This recipe looks amazing! Can't wait to try it.
Comments are stored locally in your browser. Server comments are displayed alongside your local comments.

Hi, I'm Emily!
What's Popular

30-Minute Meals!
Join to receive our email series which contains a round-up of some of our quick and easy family favorite recipes.