
>>

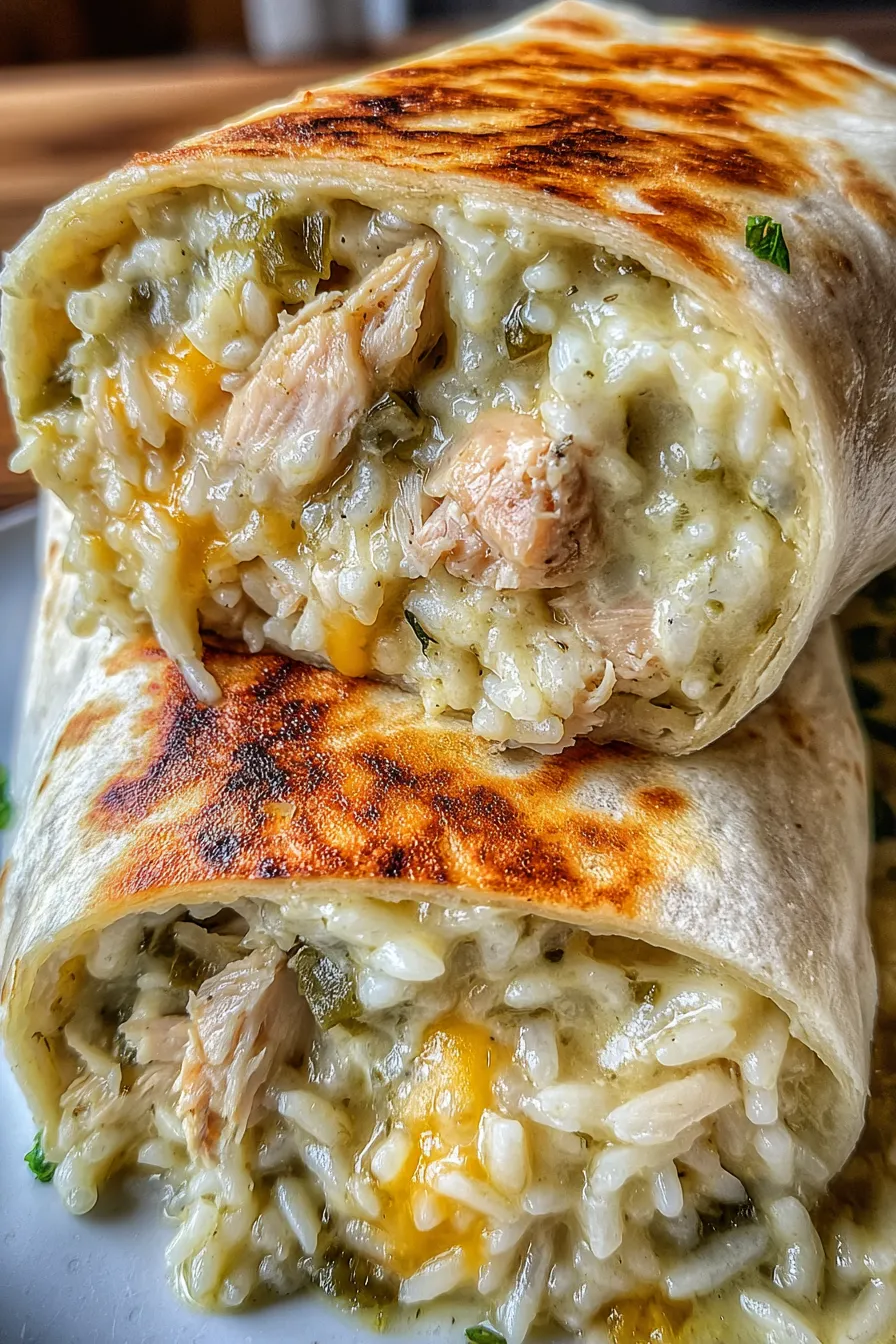
A smoky, creamy handheld filled with shredded smoked chicken, tangy green chiles, cheddar, rice, and salsa — golden and crisp on the outside, comforting on the inside.

This smoked chicken green chile burrito is one of those things I reach for when I want flavor and comfort without fuss. I first put this combination together after coming home from a backyard smoking session; I had a generous amount of pulled smoked chicken and a fridge full of pantry staples. Mixing the smoky meat with canned green chiles, melty cheddar, creamy sour cream, and cooked rice turned a simple sandwich into a meal that quickly became my family’s favorite quick dinner. The contrast of the warm, tender filling against a crisped tortilla makes every bite satisfying and slightly nostalgic.
What makes this preparation special is how forgiving it is: the filling is forgiving with seasoning, the green chiles add a gentle kick that plays well with mild salsa, and the sour cream binds the filling so it doesn’t fall apart while rolling. I love serving these on hectic weeknights because the skillet finish takes only minutes and gives you that to-die-for golden exterior. Over the years I’ve learned a few tweaks that make the rolling and pan-searing steps foolproof, and those are woven into the instructions below so you get reliably excellent results the first time.
I remember serving these the first time at a casual backyard game night. Everyone circled the skillet as I flipped the burritos and the toasted scent filled the air. My teenager declared them the best convenience dinner ever, and they disappeared faster than I expected. A small batch goes a long way; on colder evenings I double the filling to have leftovers for lunch the next day.
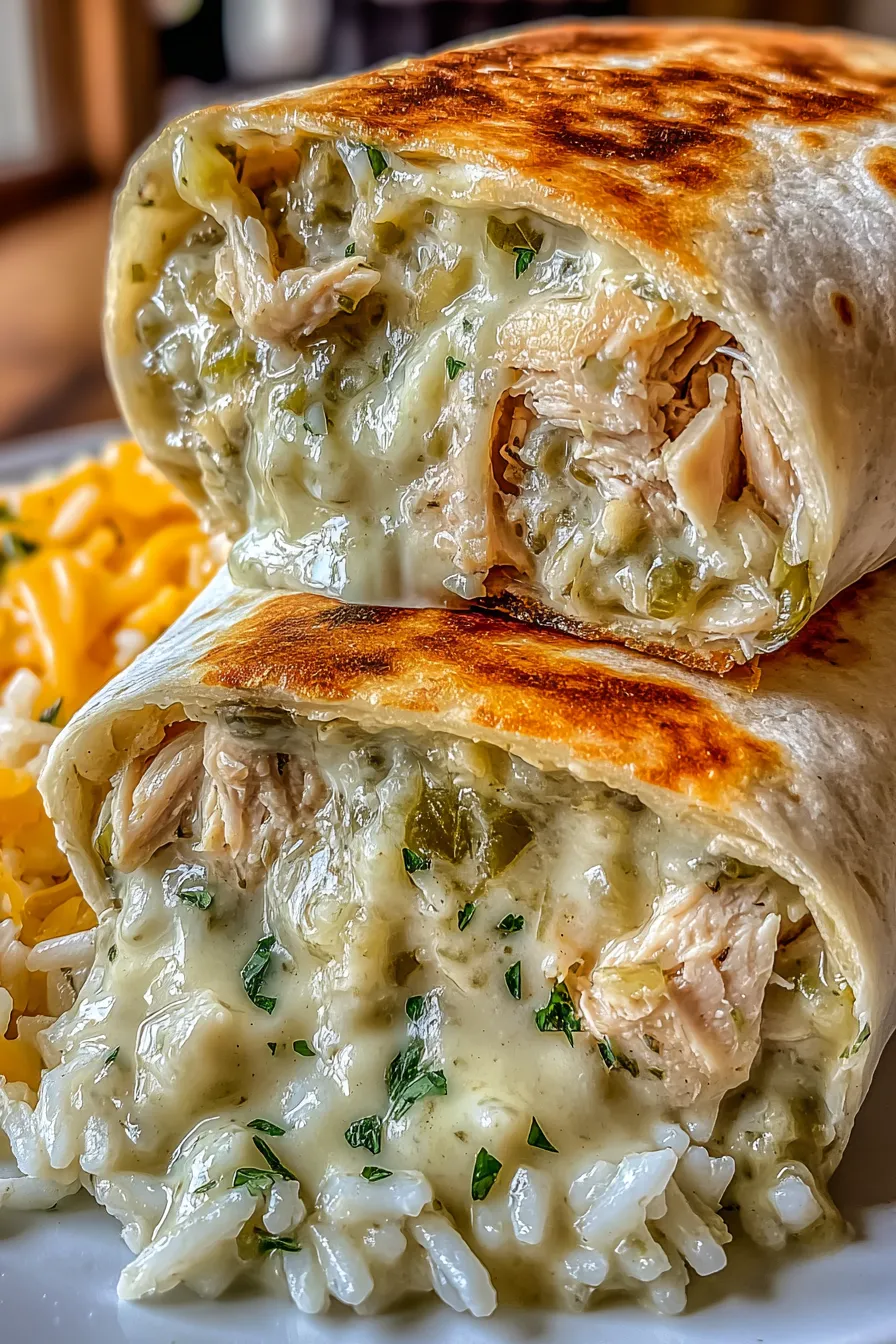
My favorite part of this combination is how approachable it is. I’ve served these at casual gatherings and weeknight dinners; they travel well and never fail to spark compliments. A quick tip I learned: pressing gently as you brown the burrito ensures the cheese melts just enough to bind the filling without turning the tortilla soggy. That crisp edge is what makes the experience special every time.
Store cooled filling in an airtight container for up to three days in the refrigerator. For the best texture, keep assembled but uncooked burritos separate from the pan-seared ones; assemble only what you plan to eat within 24 hours. To freeze, wrap each burrito tightly in plastic wrap and aluminum foil, then place in a freezer bag for up to three months. Reheat from frozen by thawing overnight and pan-searing as directed, or bake at 350 degrees Fahrenheit for 20 to 25 minutes until heated through and crisp.
If you prefer a lighter option, swap the sour cream for plain Greek yogurt at a one-to-one ratio for similar creaminess with added protein. Use Monterey Jack or Pepper Jack in place of cheddar for a creamier melt or spicier kick. Substitute cooked brown rice 1:1 if you want additional fiber; note brown rice will add a slightly nuttier texture. For a vegetarian version, replace chicken with cooked black beans or roasted cauliflower and increase cheese or add crumbled queso fresco for depth.
Serve these burritos with a side of crisp romaine salad tossed with lime vinaigrette, a bowl of tortilla chips and extra salsa, or pickled jalapeños for heat. Garnish with a drizzle of crema or a spoonful of additional sour cream and chopped cilantro for color. For a heartier meal, pair with Mexican-style street corn or a simple avocado and tomato salad. Cut a burrito in half on the bias for an attractive presentation and to expose the creamy filling.
The burrito has roots in Northern Mexico and became a fixture in Southwestern American cuisine, where smoked meats and green chiles are regional favorites. This particular combination borrows the smoky protein and adds canned diced green chiles — a pantry staple in New Mexico and surrounding areas — to create a quick cross between traditional burritos and Southern comfort. The method of warming tortillas and crisping them in a skillet reflects a longtime American home-cooking technique to modernize and speed up classic preparations.
In summer, add fresh grilled corn and pico de gallo to brighten the filling. During colder months, fold roasted poblano strips and sautéed onions into the mixture for deeper flavor. For holiday gatherings, make a large batch using smoked turkey instead of chicken; the familiar holiday taste turns these into a celebratory leftover meal. The recipe scales easily: double ingredients for a crowd and keep tortillas warm in a low oven until ready to assemble.
Make the filling two to three days in advance and store it chilled. Portion the filling into four equal amounts and keep tortillas wrapped in a clean kitchen towel in the refrigerator; warming just before assembly will prevent tears. For grab-and-go lunches, fully assemble and wrap burritos individually and freeze; thaw in the refrigerator overnight and heat in a skillet or toaster oven to reestablish the crisp exterior. Use insulated containers if packing warm to maintain texture.
This smoked chicken green chile burrito is built for everyday life — reliable, flavorful, and generous. Whether feeding a family, prepping lunches, or entertaining a small group, this build-it-yourself approach rewards you with consistent results and plenty of room to personalize flavors. Go ahead and make it your own.
Warm tortillas briefly before filling to prevent tearing and make rolling easier.
Press gently with a spatula while browning to help the cheese bind the filling without making the tortilla soggy.
Use a block of cheese and shred it yourself for better melt and texture compared with pre-shredded cheese.
Cool freshly cooked rice slightly before mixing to avoid excess moisture in the filling.
This nourishing smoked chicken green chile burrito recipe is sure to be a staple in your kitchen. Enjoy every moist, high protein slice — it is perfect for breakfast or as a wholesome snack any time.
Yes. To freeze, wrap tightly in plastic and foil and store for up to 3 months. Thaw in the refrigerator overnight before reheating.
Use a low-sodium salsa and drain the canned chiles to reduce sodium. Taste before adding extra salt.
This Smoked Chicken Green Chile Burrito recipe makes perfectly juicy, tender, and flavorful steak every time! Serve with potatoes and a side salad for an unforgettable dinner in under 30 minutes.
In a large mixing bowl, combine shredded smoked chicken, drained diced green chiles, shredded cheddar, cooked rice, sour cream, salsa, garlic powder, onion powder, salt, and black pepper. Fold gently until evenly blended.
Place the flour tortillas on a microwave-safe plate and heat for about 20 seconds to increase pliability. Alternatively, warm each tortilla in a dry skillet for 10 to 15 seconds per side.
Divide the filling into four equal portions and place in the center of each warmed tortilla. Fold the sides inward, then roll tightly from bottom to top to enclose the filling.
Coat a large skillet with cooking spray or a thin layer of vegetable oil and preheat over medium heat. Place burritos seam-side down and cook 2 to 3 minutes per side until golden brown and crisp.
Last Step: Please leave a rating and comment letting us know how you liked this recipe! This helps our business to thrive and continue providing free, high-quality recipes for you.
Leave a comment & rating below or tag
@cravele on social media!

Ultra-fudgy brownies studded with chocolate chunks, crowned with gooey marshmallows and a quick cocoa icing for irresistible, crowd-pleasing decadence.

Buttery shortbread crust topped with a gooey brown sugar pecan filling. Easy, crunchy, and truly irresistible with just 10 minutes of prep.

Silky pumpkin cheesecake with a spiced graham crust, no cracks, effortless mixing, and decadent caramel and rum whipped cream for unforgettable holiday celebrations.
Leave a comment & rating below or tag @cravele on social media!
Enjoyed this recipe? Share it with friends and family, and don't forget to leave a review!
This recipe looks amazing! Can't wait to try it.
Comments are stored locally in your browser. Server comments are displayed alongside your local comments.

Join to receive our email series which contains a round-up of some of our quick and easy family favorite recipes.
