
>>

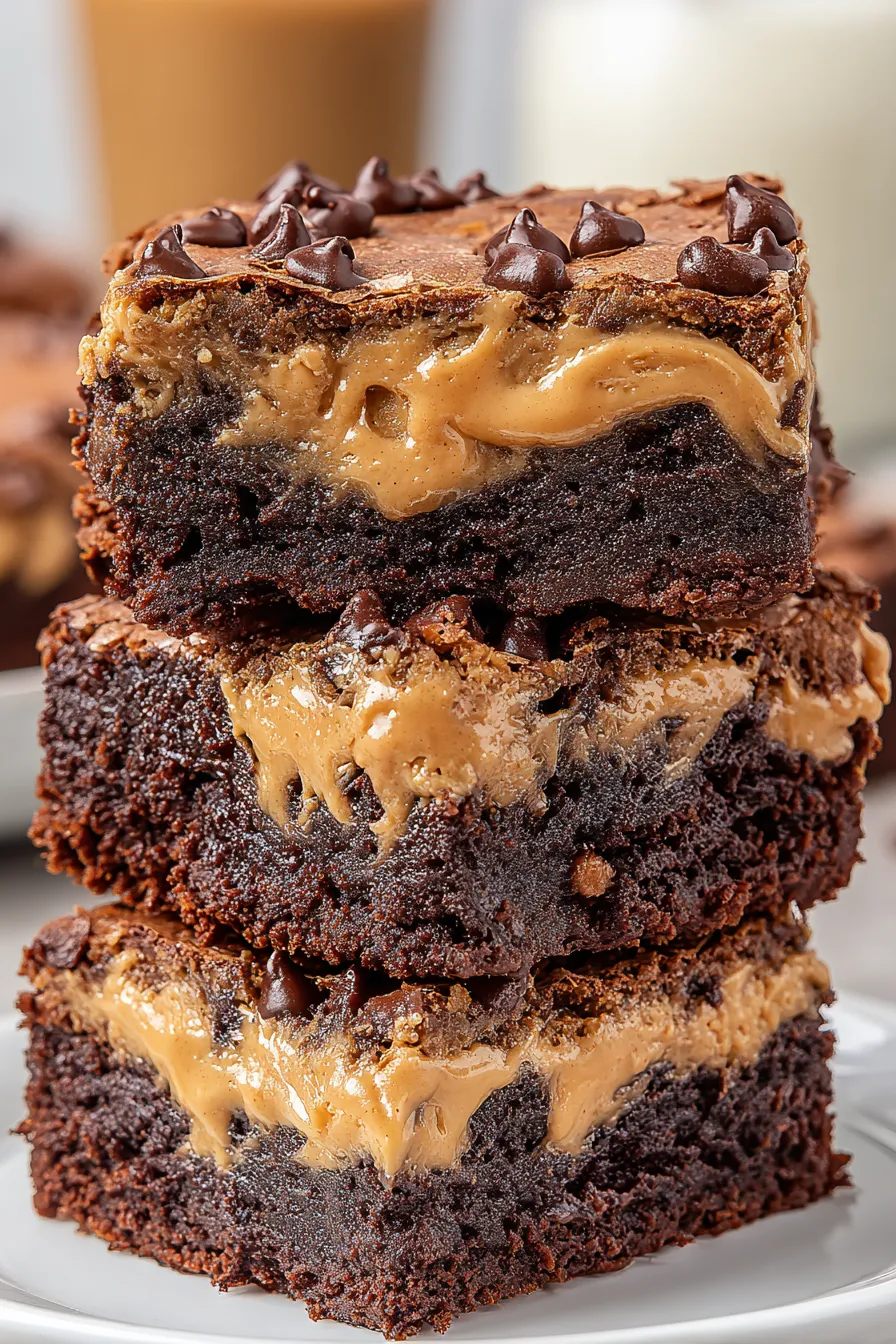
Fudgy, peanut-butter-studded brownies with swirls of creamy peanut butter—easy to make and utterly irresistible.
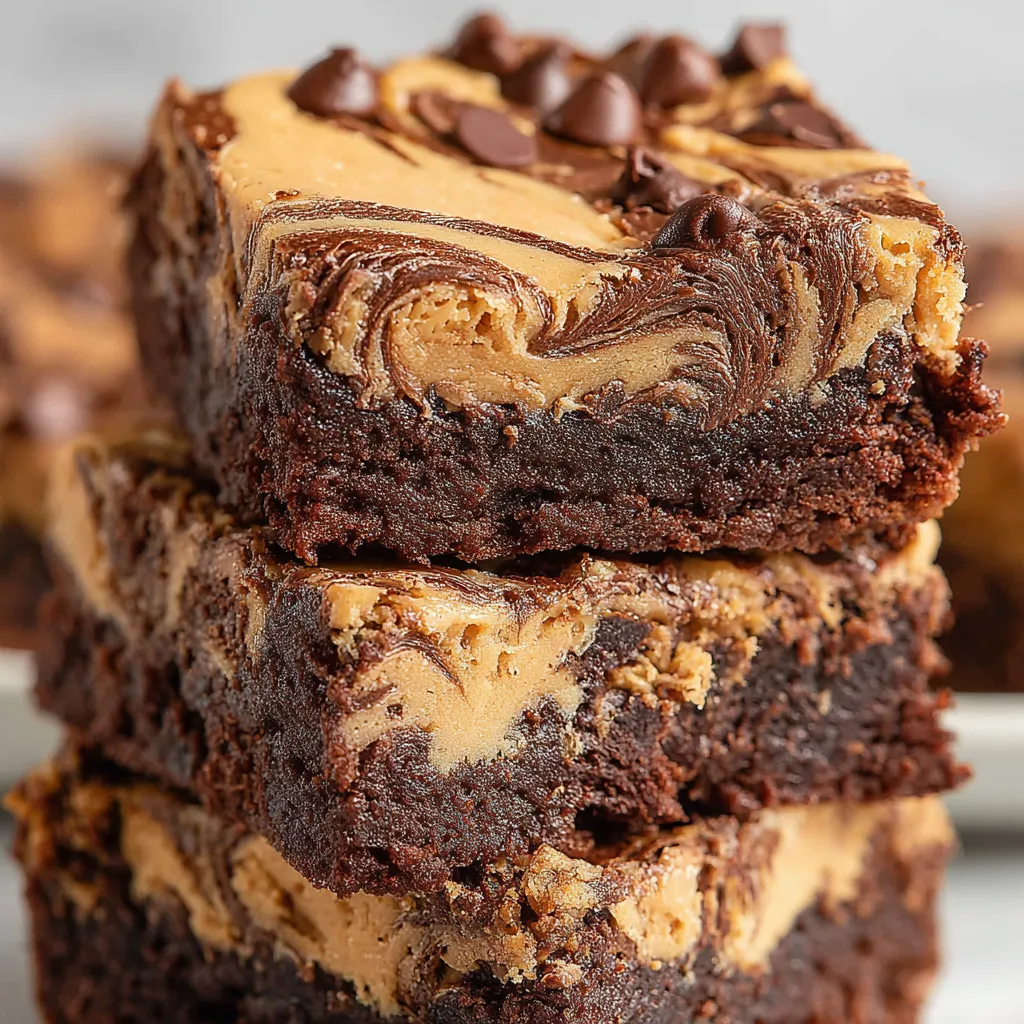
This batch of peanut butter brownies is the one I reach for when I want to impress with very little effort. I discovered this combination in a sleepy weekend experiment years ago when I had leftover creamy peanut butter and a sudden chocolate craving. The result was a dense, fudgy bar studded with chocolate chips and threaded with ribbons of peanut butter that melt into every bite. They became an instant favorite with family and friends and a staple for potlucks and after-school snacks.
What makes these brownies special is the balance of textures: a tender, moist crumb from the melted butter and sugars, pockets of creamy peanut butter, and the occasional burst of whole chocolate chips. The peanut butter swirl cuts through the richness with a savory, nutty note so each square feels decadent but never cloying. I love that the recipe uses basic pantry ingredients and comes together quickly—perfect for last-minute baking and for turning ordinary moments into small celebrations.
I first served these at a family gathering and watched them disappear faster than my other desserts. My sister called them “dangerously good,” and my partner requested them for every birthday that year. Over time I’ve tuned the swirl ratio—reserving one-third of the peanut butter for the glossy swirl on top—and that small detail elevated the look and flavor dramatically. These brownies have become my go-to treat when I need something comforting that still feels a little special.
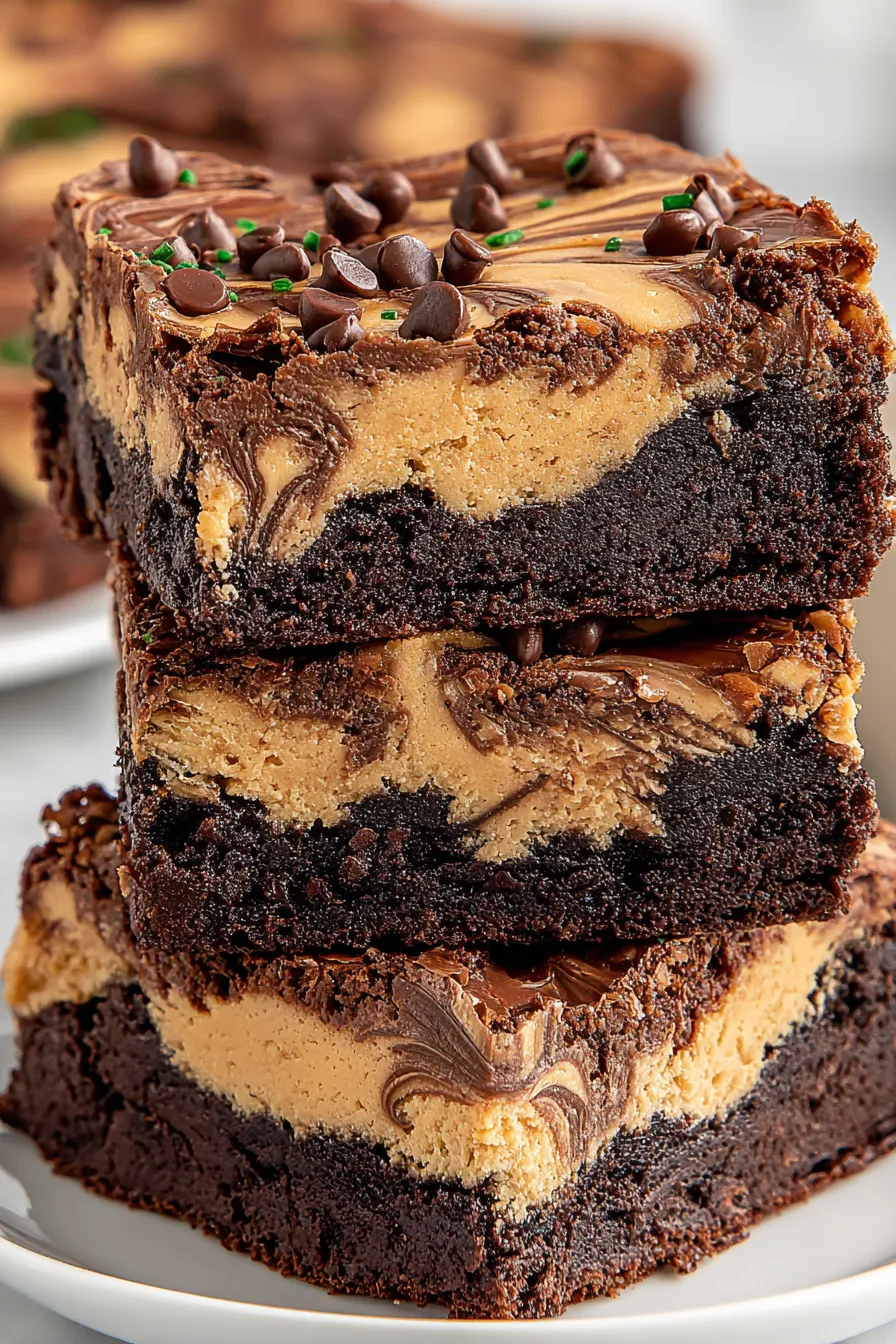
My favorite part is how the simple swirl makes store-bought brownies look artisanal. I once brought these to a casual potluck and neighbors came back asking for the recipe. The warm peanut butter ribbons keep the top glossy and give every bite a little surprise. If you prefer a more pronounced peanut presence, use chunky peanut butter for texture or reduce the chocolate chips slightly to let the nutty flavors sing.
Store the bars at room temperature in an airtight container for up to three days; place parchment between layers to prevent sticking. For longer storage, place individual squares in a single layer on a baking sheet and freeze until solid, then transfer to a freezer-safe bag. Thaw at room temperature for 30–60 minutes or microwave for 10–15 seconds for a warm treat. To refresh slightly stale edges, warm in a 300°F oven for 5–7 minutes wrapped in foil to revive softness without overbrowning.
If you need to make adjustments, substitute melted coconut oil for butter in a 1:1 ratio for a dairy-free version, but expect a slightly different crumb and flavor. For gluten-free bars, use a cup-for-cup gluten-free flour blend with xanthan gum and reduce mixing to prevent grittiness. Swap the chocolate chips for chopped chocolate for a creamier melt, or replace half the peanut butter with almond butter for a milder nutty flavor—reduce the swirl amount if you prefer less sweetness.
These bars are excellent on their own, but elevate them with a scoop of vanilla ice cream, a drizzle of warm salted caramel, or a sprinkle of flaky sea salt to highlight the peanut butter. Serve as dessert after a casual meal, pack into picnic boxes, or plate with fresh berries for contrast. For a casual party, cut into smaller bite-sized pieces and arrange on a platter with assorted cookies and fruit for variety.
Brownies are an American classic originating in the late 19th century, prized for their dense chocolate texture and portability. Adding peanut butter is a modern twist that blends chocolate’s universal appeal with America’s long love affair with peanuts and peanut butter. This mashup reflects home baking’s evolution—simple pantry ingredients adapted for maximum comfort and nostalgia.
In cooler months, add a pinch of cinnamon and espresso powder to amplify depth. For summer gatherings, serve chilled brownie squares topped with whipped cream and sliced strawberries. For holidays, fold in finely chopped roasted peanuts and top with crushed pretzel pieces for a sweet-and-salty holiday riff. Swap semi-sweet chips for dark chocolate during winter to balance heavier seasonal sweets.
Make a double batch and freeze half for later: bake, cut into squares, flash-freeze on a sheet, then transfer to freezer bags. Label with date and reheat individual squares in the microwave for about 10–15 seconds or thaw overnight in the fridge. Pre-portion into single-serve containers with a napkin for school lunches or after-school snacks. These bars also travel well for bake sales—wrap in wax paper and tie with twine for a charming presentation.
These peanut butter brownies are simple, flexible, and reliably delicious—one of those go-to desserts that feel homemade and thoughtful. Whether you’re sharing them with friends or savoring a quiet square with coffee, they deliver comfort and a little indulgence in every bite. Make them your own by adjusting the swirl, chocolate level, or add-ins, and enjoy the smiles they bring.
Do not overmix once the flour is added; fold until just combined to keep the texture fudgy.
Allow brownies to cool completely before slicing—warm brownies will crumble and not hold clean edges.
Warm the reserved peanut butter slightly so it spreads and swirls easily without breaking the batter surface.
To check doneness, look for slightly glossy centers and a few moist crumbs on a toothpick rather than a dry tester.
This nourishing peanut butter brownies recipe is sure to be a staple in your kitchen. Enjoy every moist, high protein slice — it is perfect for breakfast or as a wholesome snack any time.
This Peanut Butter Brownies recipe makes perfectly juicy, tender, and flavorful steak every time! Serve with potatoes and a side salad for an unforgettable dinner in under 30 minutes.
Preheat oven to 350°F. Line a 9x9-inch baking dish with parchment paper leaving an overhang. Lightly spray parchment with nonstick spray.
In a small bowl whisk together flour, cocoa powder, baking powder, and chocolate chips until evenly distributed.
In a medium bowl, whisk melted and cooled butter with sugars until combined. Add eggs one at a time, then vanilla and kosher salt, mixing gently.
Fold dry ingredients into wet ingredients with a spatula until just combined. Do not overmix to maintain a fudgy texture.
Spread half the batter into the prepared pan. Dollop teaspoons of 2/3 cup peanut butter across. Spread remaining batter over the dollops.
Warm the remaining 1/3 cup peanut butter for about 10 seconds in the microwave, stir to loosen, drizzle over the top and swirl with the tip of a knife.
Bake for about 30 minutes until a toothpick comes out with a few moist crumbs. Cool completely at room temperature for about 2 hours before slicing into 16 squares.
Last Step: Please leave a rating and comment letting us know how you liked this recipe! This helps our business to thrive and continue providing free, high-quality recipes for you.
Leave a comment & rating below or tag
@cravele on social media!

Ultra-fudgy brownies studded with chocolate chunks, crowned with gooey marshmallows and a quick cocoa icing for irresistible, crowd-pleasing decadence.

Buttery shortbread crust topped with a gooey brown sugar pecan filling. Easy, crunchy, and truly irresistible with just 10 minutes of prep.

Silky pumpkin cheesecake with a spiced graham crust, no cracks, effortless mixing, and decadent caramel and rum whipped cream for unforgettable holiday celebrations.
Leave a comment & rating below or tag @cravele on social media!
Enjoyed this recipe? Share it with friends and family, and don't forget to leave a review!
This recipe looks amazing! Can't wait to try it.
Comments are stored locally in your browser. Server comments are displayed alongside your local comments.

Join to receive our email series which contains a round-up of some of our quick and easy family favorite recipes.
