
>>

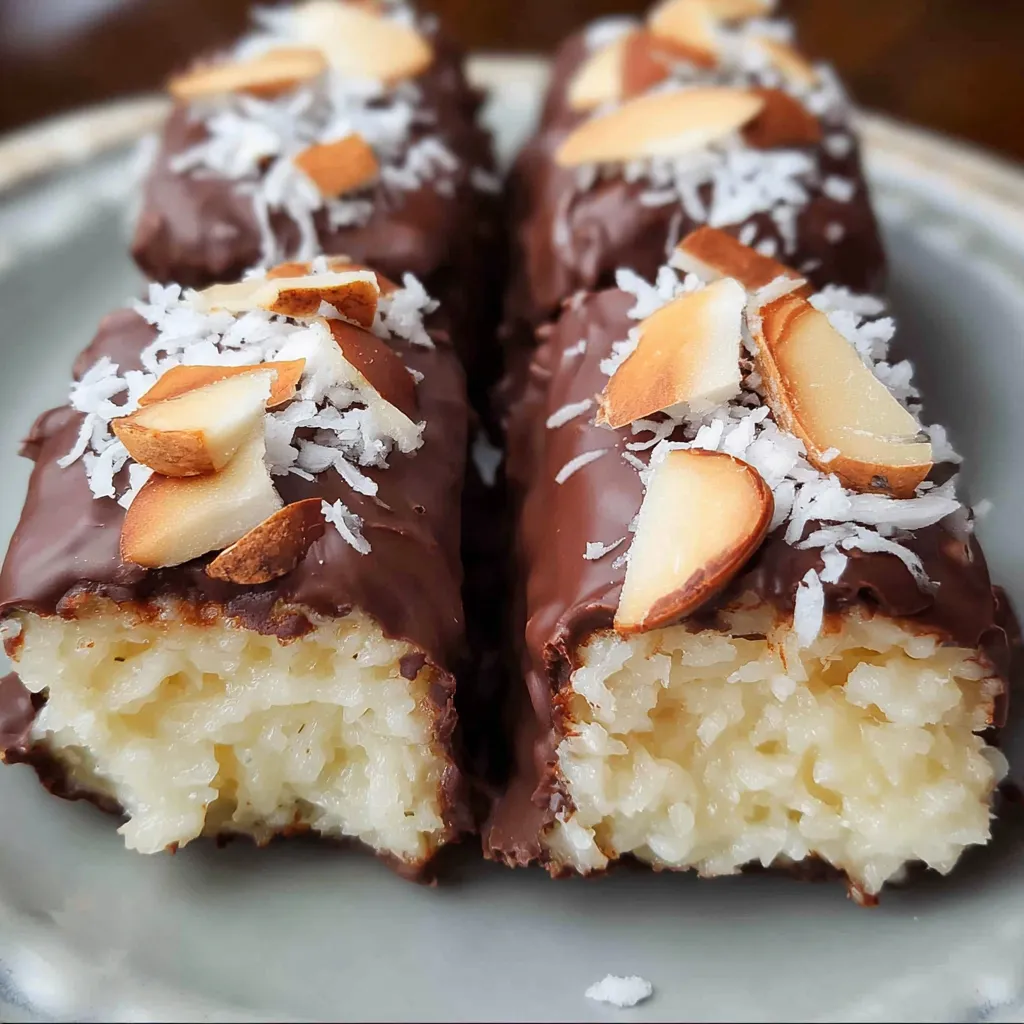
Chewy coconut centers topped with whole almonds and coated in melted chocolate for an easy at home Almond Joy style treat.
This Almond Joy inspired treat has become a ritual in my kitchen whenever I need a quick, nostalgic pick me up. I first made this version on a rainy afternoon when I had a craving for the candy bars from childhood and a pantry full of simple ingredients. The result was so satisfying that it earned a permanent spot in my weekend snack rotation. The center is tender and chewy with bright coconut flavor, the almond adds a pleasant crunch, and the chocolate coating melts to a glossy finish that snaps when you bite into it.
I love how few ingredients deliver such a layered taste and texture. I learned to chill the canned coconut milk first, which helps the base come together in the blender without becoming watery. The bars travel well and are perfect for gifting or packing in lunch boxes. They are a quick project when guests pop in and a comforting solo treat when you want something sweet without fuss.
When I first tested this version, my partner declared it better than the store bought option. Our friends asked for the recipe after a gathering and one neighbor requested a second batch the next day. That kind of quick adoration is why I keep coming back to this simple approach.

One of my favorite aspects is that the texture is adjustable. You can pulse less for a coarser chew or more for a denser, fudgier center. At a holiday potluck these were the first to disappear and everyone commented on the fresh coconut flavor which feels special compared to store bought bars.
Store the bars in a single layer or separated by parchment in an airtight container. Keep them in the refrigerator for up to 10 days. For longer storage layer the bars in a freezer safe container with parchment between layers. Freeze for up to 3 months. Thaw overnight in the refrigerator and bring to room temperature for 10 to 15 minutes before serving for a softer bite. To reconstitute the glossy chocolate appearance after thawing, let the bars sit at room temperature briefly rather than microwaving.

If you want a nuttier profile swap half of the almonds for chopped walnuts or pecans. For a lower sugar option use unsweetened chocolate chips and increase the maple syrup in the coconut base by a teaspoon to balance bitterness. To make the center creamier use a tablespoon of coconut oil in the blender which will yield a smoother mouthfeel. For a nut free option omit the almonds and press a few chocolate shavings into the top before chilling.
Serve as a small dessert with coffee or black tea. For a party arrange them on a platter with a sprinkling of toasted coconut flakes for contrast. They are also excellent paired with fresh fruit like sliced oranges for a bright counterpoint. For gifting place three or four bars in a small box lined with parchment and tie with a ribbon to present to neighbors or friends.
These coconut and almond bars are inspired by a classic American candy bar combining coconut centers, whole nuts, and a chocolate coating. Coconut candies and confections trace roots to tropical cuisines where coconut is a staple. The commercial bar popularized the combination but homemade versions have long been made in home kitchens using similar simple techniques of binding, chilling, and coating.
In winter add a pinch of ground cinnamon and a teaspoon of orange zest to the coconut base for warm holiday notes. In summer try leaving them with dark chocolate and a few flakes of sea salt on top for a bright contrast. For spring make mini versions and top with a colorful sprinkle for a festive look at gatherings.
Make a double batch and keep half frozen for later. Form the logs and freeze them before dipping, then coat a few at a time to keep the chocolate temperature stable. Use a sheet pan lined with parchment to move bars in and out of the freezer quickly. Measure ingredients ahead and store the coconut mixture in the fridge for up to 48 hours if you want to complete assembly later.
These bars are a simple, satisfying way to showcase coconut and almonds with melt in your mouth chocolate. They are forgiving in technique and rewarding in flavor so I encourage you to try a batch and make it your own.
Chill the canned coconut milk before blending to keep the mixture firm and avoid separation.
Toast the almonds lightly in a dry skillet for 3 to 5 minutes for added aroma and crunch.
Work with small batches when dipping to keep the chocolate temperature even and prevent clumping.
Use parchment to prevent sticking and make cleanup easy.
If chocolate is grainy, stir in a teaspoon of coconut oil to smooth the texture.
This nourishing homemade almond joy bars recipe is sure to be a staple in your kitchen. Enjoy every moist, high protein slice — it is perfect for breakfast or as a wholesome snack any time.
This Homemade Almond Joy Bars recipe makes perfectly juicy, tender, and flavorful steak every time! Serve with potatoes and a side salad for an unforgettable dinner in under 30 minutes.
Combine 1 cup shredded coconut, 3/4 cup chilled canned coconut milk, and 2 tablespoons maple syrup in a blender or food processor. Pulse then blend until the mixture holds together when pressed. Scrape sides as needed.
Divide the mixture into 12 equal portions and shape each into a rectangular log about 2 inches long and 1 inch wide. Place on a parchment lined plate.
Press one almond into the top of each log. Freeze the plate for 15 minutes to firm the centers before dipping.
Heat 1 1/4 cups chocolate chips in a microwave safe bowl in 20 second bursts, stirring between each until smooth. Alternatively melt over low heat in a small saucepan.
Use two forks to lower each chilled bar into the melted chocolate and coat fully. Tap off excess and return to the parchment lined plate. Refrigerate until the chocolate firms, about 20 to 30 minutes.
Last Step: Please leave a rating and comment letting us know how you liked this recipe! This helps our business to thrive and continue providing free, high-quality recipes for you.
Leave a comment & rating below or tag
@cravele on social media!

Ultra-fudgy brownies studded with chocolate chunks, crowned with gooey marshmallows and a quick cocoa icing for irresistible, crowd-pleasing decadence.

Buttery shortbread crust topped with a gooey brown sugar pecan filling. Easy, crunchy, and truly irresistible with just 10 minutes of prep.

Silky pumpkin cheesecake with a spiced graham crust, no cracks, effortless mixing, and decadent caramel and rum whipped cream for unforgettable holiday celebrations.
Leave a comment & rating below or tag @cravele on social media!
Enjoyed this recipe? Share it with friends and family, and don't forget to leave a review!
This recipe looks amazing! Can't wait to try it.
Comments are stored locally in your browser. Server comments are displayed alongside your local comments.

Join to receive our email series which contains a round-up of some of our quick and easy family favorite recipes.
