
>>

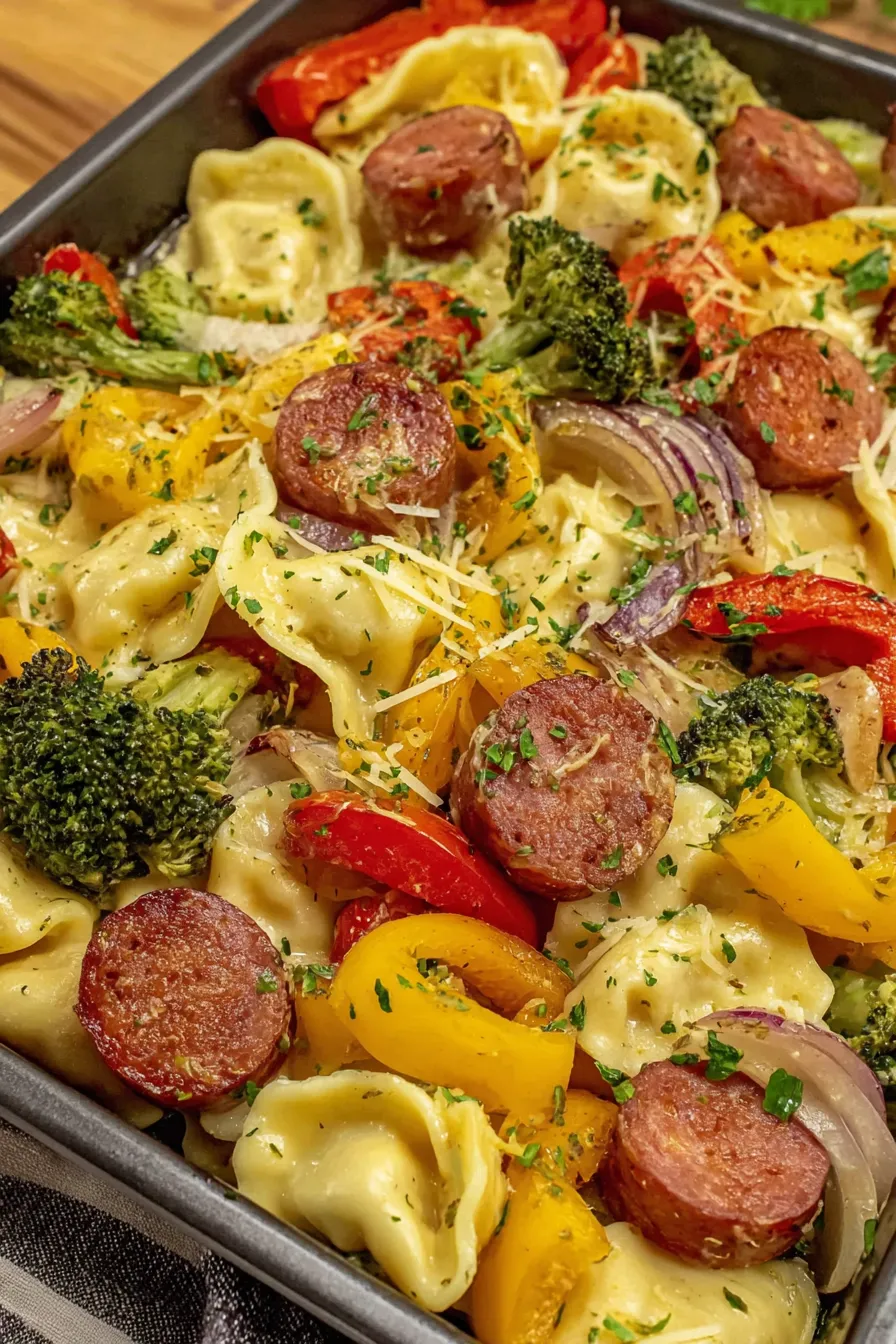
A one-pan weeknight winner: crispy pierogies, smoky kielbasa, and roasted vegetables finished with garlic butter and a dollop of sour cream.
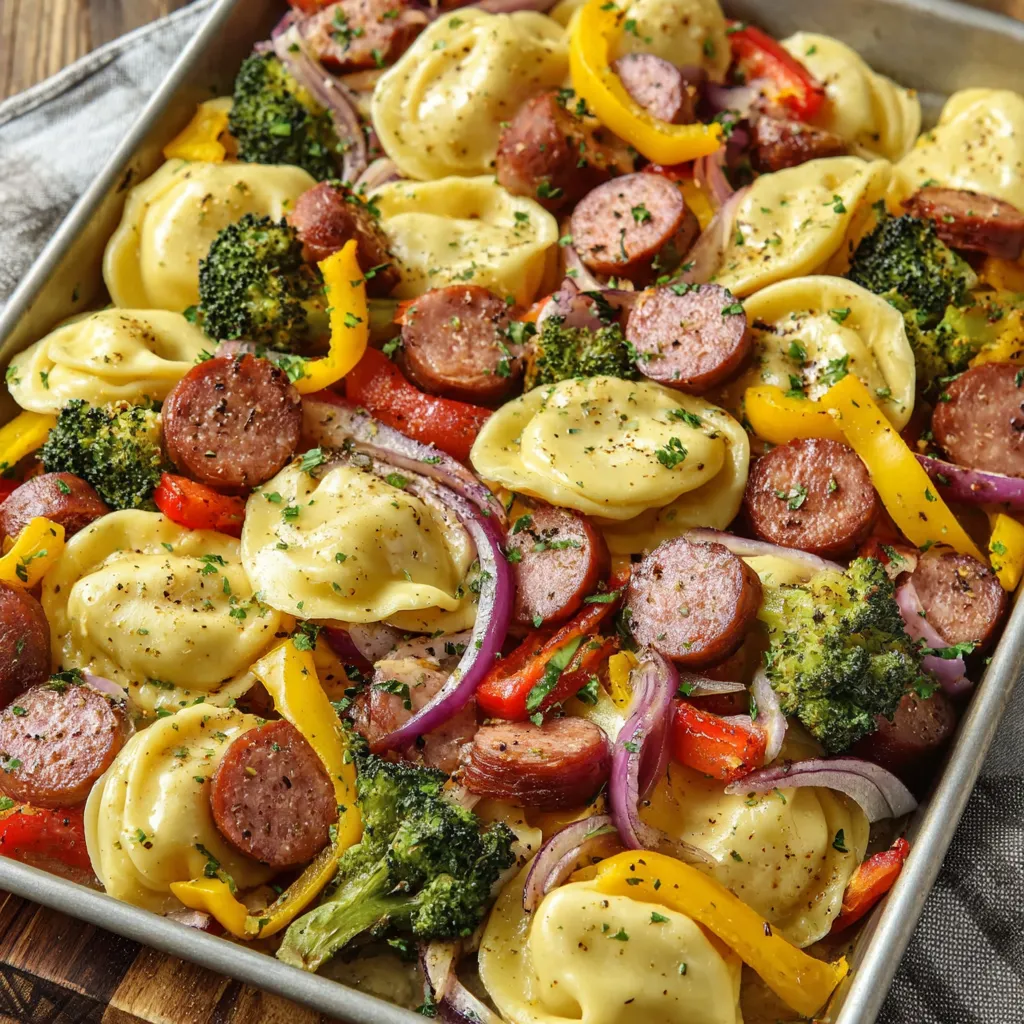
This sheet pan version of pierogies and kielbasa became my go-to comfort meal the first winter I wanted something fast, filling, and forgiving. I discovered the combination one busy evening when I had a package of frozen pierogies and a kielbasa in the fridge and no energy for multiple pots. Roasting everything together transformed humble frozen pockets into golden, slightly crisp pillows, while the kielbasa released savory fat that flavored the vegetables. It is the kind of meal that smells like home and gathers everyone to the table without much fuss.
What makes this dish special is how few steps stand between ingredients and a satisfying plate. The texture contrast—crispy edges on the pierogies, caramelized peppers and onions, tender broccoli, and snappy kielbasa slices—is what keeps people coming back. I love that it adapts to what’s in the pantry: swap peppers for zucchini or add mushrooms, and it still works. On weeknights it feels effortless; on weekends it feels indulgent. The family always asks for sour cream on the side, and the optional melted garlic butter at the end is a small flourish that changes everything.
I first served this to friends after a snowstorm when the roads were bad and everyone arrived hungry. The warm, garlicky aroma filled the living room and made the evening feel cozy. People loved the crisp pierogy edges and the bright bell pepper notes. It has since become a requested quick dinner and late-night snack at our house.
What I love most is how this dish transforms simple, inexpensive ingredients into something celebratory. I once brought it to a casual potluck and people assumed I had spent hours cooking. The secret is the hot oven and the little flips halfway through. It has become a signature easy meal for our household and a favorite for informal gatherings.
To store, cool the tray completely before transferring to airtight containers to avoid condensation and sogginess. Refrigerate for up to 3 days. For freezing, portion into meal-sized containers and freeze for up to 3 months. Reheat from frozen in a 375°F oven for 15 to 20 minutes, or until heated through; a light spray of oil or a dot of butter helps restore crispness. Avoid microwaving if you want to keep the edges crisp; instead, reheat on a sheet pan in a hot oven or toaster oven.
If you prefer a lighter option, swap smoked kielbasa for turkey kielbasa or a plant-based sausage. For gluten-free variations, buy gluten-free pierogies or make filled potato dumplings using a gluten-free dough. Swap broccoli for cauliflower or green beans if you prefer, and use olive oil or avocado oil interchangeably. If dairy is a concern, skip the butter and serve with a dairy-free yogurt or a tangy cashew cream as an alternative to sour cream.
Serve directly from the sheet pan for casual family-style dining or transfer to a warmed platter for guests. Pair with a crisp green salad and a bright vinaigrette to cut the richness. For a heartier meal, add a side of roasted root vegetables or warm crusty bread. Garnish with chopped parsley or sliced green onions and offer individual ramekins of sour cream and hot sauce for personalization.
Pierogies have Eastern European roots, particularly Polish and Ukrainian traditions, where they are often filled with potato, cheese, sauerkraut, or meat. Kielbasa is a smoked Polish sausage that pairs naturally with pierogies in regional cuisine. This sheet pan approach modernizes the tradition by using oven-roasting to create texture contrasts similar to pan-frying, a common technique in home cooking across Eastern Europe and North America.
In summer, swap bell peppers for seasonal zucchini, summer squash, and cherry tomatoes; add fresh herbs like basil at the end. In autumn, incorporate roasted root vegetables like butternut squash and Brussels sprouts for a heartier tray. For winter holidays, use spiced sausage and top with caramelized onions and a drizzle of mustard cream for a festive finish.
Assemble the seasoned mixture in a large bowl and keep it covered in the refrigerator for up to 24 hours; when ready, spread onto the sheet pan and roast. This is great for prepping multiple dinners: portion cooked leftovers into meal containers and reheat in a hot oven for the best texture. Use two sheet pans if cooking for a crowd to avoid crowding and steaming.
Ultimately, this one-pan method simplifies a beloved comfort combination into an easy, crowd-pleasing dish you can turn to any night of the week. Make it your own with swaps and finishes, and enjoy the little ritual of passing the pan around the table.
Keep the pierogies frozen until they go into the oven to help them crisp rather than steam.
Spread ingredients in a single layer; crowding causes steaming and soggy edges.
Flip pierogies and kielbasa halfway through roasting for even browning and texture.
Use a hot oven (425°F) to promote caramelization; reduce to 400°F if browning too quickly.
Reheat leftovers on a sheet pan in a hot oven to restore crispness rather than microwaving.
This nourishing easy sheet pan pierogies and kielbasa recipe is sure to be a staple in your kitchen. Enjoy every moist, high protein slice — it is perfect for breakfast or as a wholesome snack any time.
This Easy Sheet Pan Pierogies and Kielbasa recipe makes perfectly juicy, tender, and flavorful steak every time! Serve with potatoes and a side salad for an unforgettable dinner in under 30 minutes.
Preheat the oven to 425°F. Line a large rimmed sheet pan with parchment paper or lightly grease it so the pierogies can brown and the pan is easy to clean.
Place the frozen pierogies, sliced kielbasa, chopped bell peppers, sliced onion, and broccoli florets into a large mixing bowl. Keeping the pierogies frozen until roasting improves texture.
Drizzle 3 tablespoons olive oil over the bowl. Add 1 teaspoon garlic powder, 1 teaspoon paprika, 1/2 teaspoon onion powder, 1/2 teaspoon salt, and 1/2 teaspoon black pepper. Toss until evenly coated so each piece browns properly.
Spread the mixture onto the sheet pan in a single layer, leaving space between pieces. Avoid crowding to prevent steaming; use a second pan if necessary.
Bake for 25 to 30 minutes at 425°F, flipping the pierogies and turning the kielbasa once at about 12 to 15 minutes. Look for golden edges on pierogies and caramelization on vegetables.
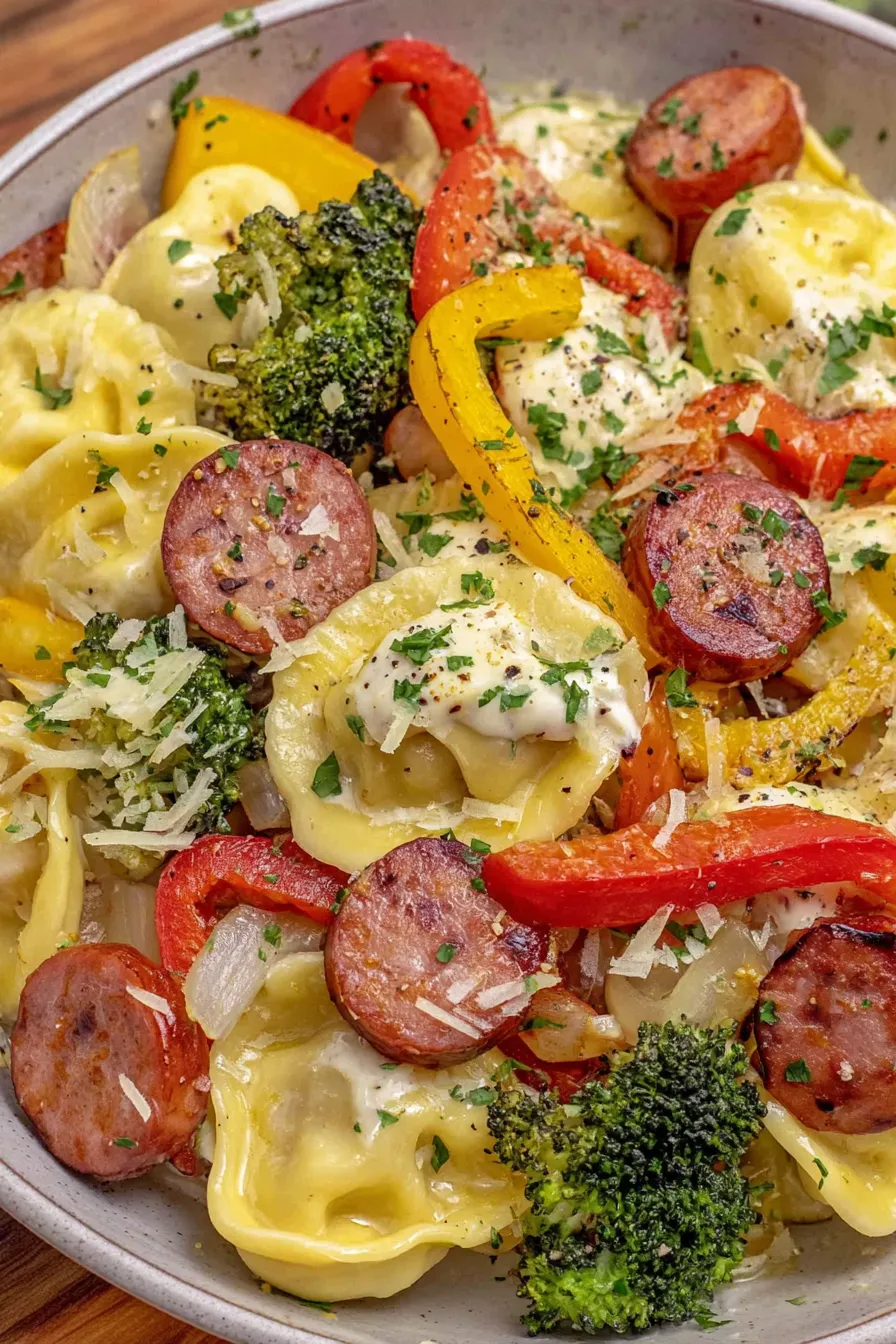
Remove from the oven and, if desired, drizzle with 2 tablespoons melted butter or garlic butter and sprinkle 2 tablespoons chopped parsley or green onions for freshness.
Serve warm with sour cream on the side for dipping. Offer additional condiments like hot sauce or mustard on the table for personalization.
Last Step: Please leave a rating and comment letting us know how you liked this recipe! This helps our business to thrive and continue providing free, high-quality recipes for you.
Leave a comment & rating below or tag
@cravele on social media!

Ultra-fudgy brownies studded with chocolate chunks, crowned with gooey marshmallows and a quick cocoa icing for irresistible, crowd-pleasing decadence.

Buttery shortbread crust topped with a gooey brown sugar pecan filling. Easy, crunchy, and truly irresistible with just 10 minutes of prep.

Silky pumpkin cheesecake with a spiced graham crust, no cracks, effortless mixing, and decadent caramel and rum whipped cream for unforgettable holiday celebrations.
Leave a comment & rating below or tag @cravele on social media!
Enjoyed this recipe? Share it with friends and family, and don't forget to leave a review!
This recipe looks amazing! Can't wait to try it.
Comments are stored locally in your browser. Server comments are displayed alongside your local comments.

Join to receive our email series which contains a round-up of some of our quick and easy family favorite recipes.
