
Decadent Brownie Pie

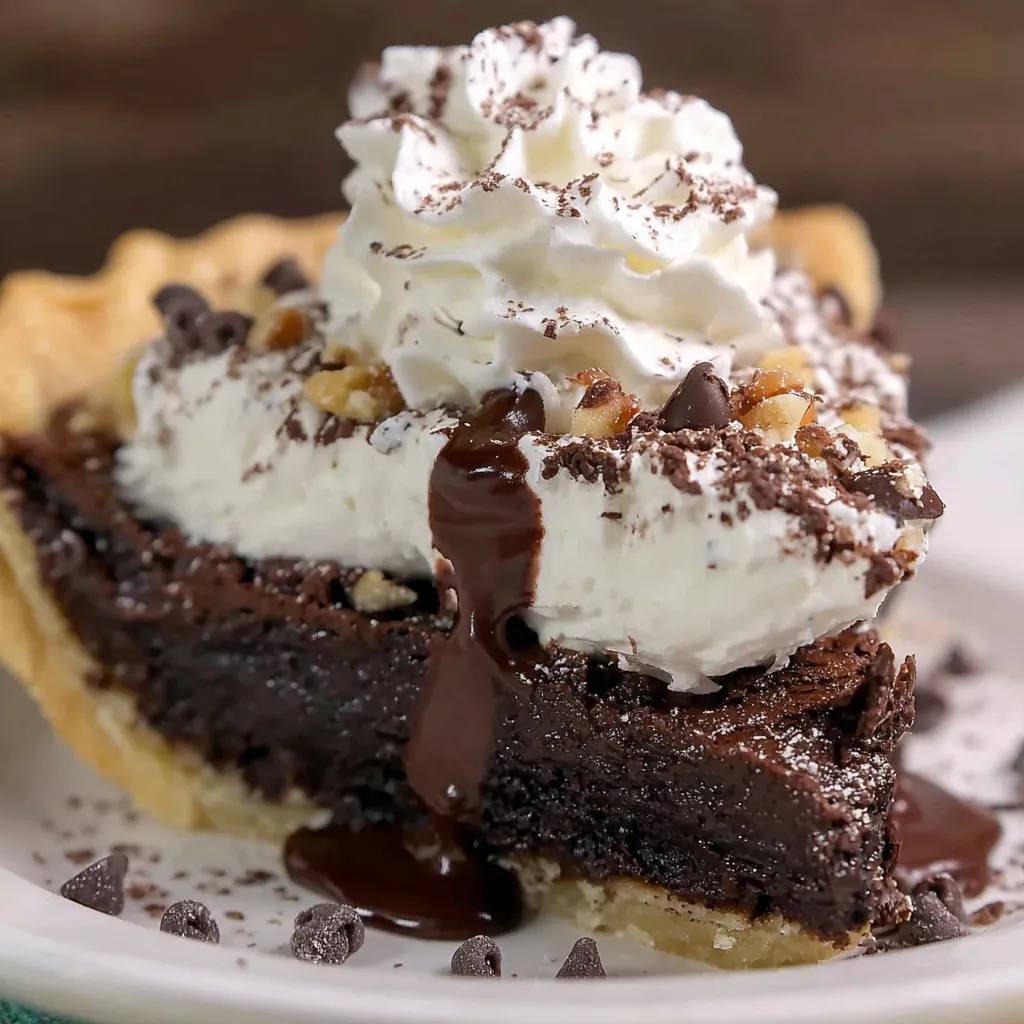
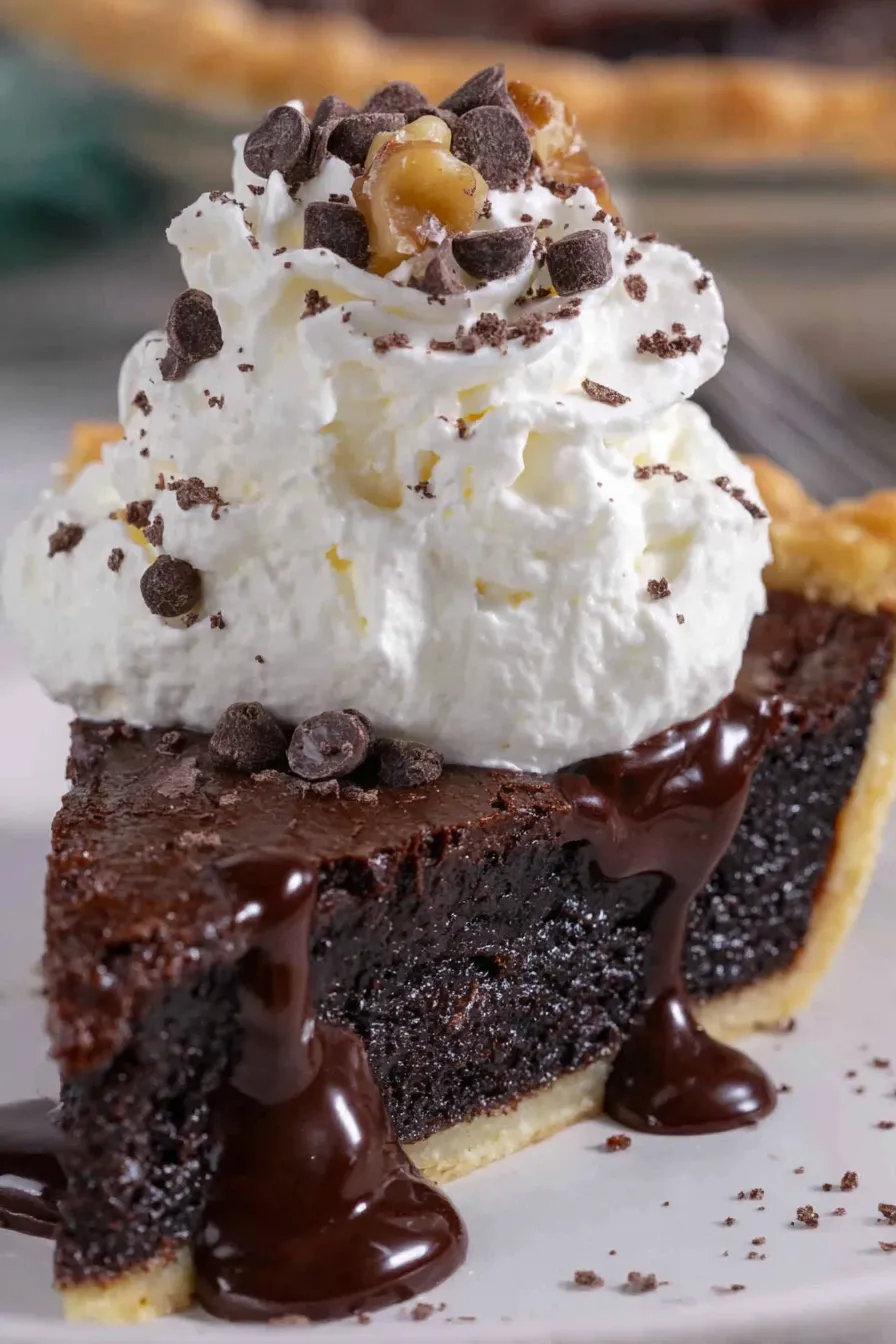
A fudgy, crackly-top brownie baked in a 9-inch pie shell — all the joy of brownies with the ease of a pie. Serve warm with ice cream or at room temperature for a firmer slice.
This brownie pie has been a celebration staple in my kitchen for years. I first baked it on a rainy Saturday when I wanted something deeply chocolatey but didn’t want to fuss with layers or multiple pans. The result was a hybrid dessert that combines the fudgy interior of a dense brownie with the ease and presentation of a pie. The melted butter and sugar interaction creates that signature glossy, crackly crust that everyone fights over, and the pre-made 9-inch pie shell keeps things quick and tidy.
What makes this version special is the balance: unsweetened cocoa for real chocolate intensity, a touch of powdered sugar for shine, and a double-hit of egg for structure while still keeping the center moist. I often bring it to potlucks because it slices beautifully and travels well. My kids love it with a scoop of vanilla ice cream, and I’ve watched neighbors go back for seconds before I can even lock the pie dish in the car.
Why You'll Love This Recipe
- This is a fast, no-fuss dessert that comes together in under an hour of active time and uses a single frozen 9-inch unbaked crust — perfect for busy weeknights or last-minute gatherings.
- The texture is delightfully fudgy in the center with a shiny, crackly top thanks to the hot butter dissolving some granulated sugar before mixing — a small technique that yields professional results.
- Ingredients are pantry staples: cocoa, flour, sugar, eggs, and chocolate chips — no specialty flours or tempering required, which makes it accessible and reliable.
- Make-ahead friendly: baked pie keeps well in the refrigerator and slices cleaner when chilled, so you can bake in advance for entertaining stress-free.
- Highly adaptable: swap semisweet for milk chocolate to sweeten things, fold in nuts for crunch, or top with whipped cream and hot chocolate sauce for a show-stopping finish.
- Portion-wise it’s flexible — serve warm with ice cream for an indulgent dessert or chilled for cleaner slices to package for gifts.
Every time I bring this to a gathering someone asks for the recipe. It’s one of those dishes that feels elevated but is actually forgiving: if you underbake it a little you get a gooier center; bake it longer for neat slices. It’s taught me that small technique details — like whisking hot butter and sugar briefly and covering with foil for the start of baking — make a big difference in texture.
Ingredients
- Frozen 9-inch unbaked pie crust: Using a store-bought frozen crust keeps this dessert fast and foolproof. Look for a high-quality refrigerated or frozen shell (Pillsbury or store brands work well) with a thick edge so it holds the brownie interior without sogging.
- 8 tablespoons unsalted butter (melted, hot/warm): Butter is the flavor anchor. Melt it until very warm; the heat helps partially dissolve the granulated sugar and creates that glossy top. Use European-style butter if you want a richer taste.
- 3/4 cup granulated sugar: Works with the hot butter to create the crackly surface. This isn’t fully dissolved — that’s okay and desirable for texture.
- 1 large egg + 1 large egg yolk: Eggs add structure and moisture. The extra yolk keeps the filling fudgy rather than cake-like.
- 1 tablespoon water & 1 1/2 teaspoons pure vanilla extract: Water loosens the batter slightly for easier spreading; vanilla enhances chocolate flavors. Use Nielsen-Massey or any pure vanilla if possible.
- 1/2 cup unsweetened cocoa powder: Choose natural unsweetened cocoa for bright chocolate flavor; Dutch-processed will give a milder, darker profile and may change baking chemistry slightly.
- 1/2 cup powdered sugar: Adds sweetness and helps with the glossy finish; sift to remove lumps if needed.
- 1/2 cup all-purpose flour: Just enough to bind without making it cakey. Spoon into the measuring cup and level off for accuracy.
- 1/4 teaspoon kosher salt: Balances and brightens the chocolate. If using table salt, reduce slightly to 1/8 teaspoon.
- 1/2 cup semisweet chocolate chips (or milk chocolate for sweeter pie): Adds pockets of melty chocolate. Choose quality chips like Ghirardelli or Guittard for a real chocolate pop.
- 1/4 cup finely chopped walnuts (optional): Toast lightly for extra nuttiness; omit for nut-free versions or swap for pecans.
- Optional toppings: Chocolate sauce, whipped cream, or ice cream — cold vanilla ice cream contrasts beautifully with a warm slice.
Instructions
Preheat and prepare:Preheat the oven to 350°F and place a rack in the lower third. Lower-rack placement helps the pie crust brown and sets the filling more evenly from the bottom. Keep your frozen crust in its tin; do not thaw before filling.Combine sugar and hot butter:Pour the hot melted butter over the granulated sugar in a large bowl. Stir briefly to coat, then let sit undisturbed for 5 minutes so the heat begins dissolving the sugar — this is the small, vital step that encourages a shiny, crackly top. After resting, whisk vigorously for about 30 seconds until the mixture looks cohesive.Add eggs, water and vanilla:Whisk in the large egg, the extra yolk, 1 tablespoon water, and 1 1/2 teaspoons vanilla for another 30 seconds until smooth. Tap the whisk against the bowl to remove excess batter and set the whisk aside so you don’t overwork the mix.Fold dry ingredients:Sprinkle 1/2 cup unsweetened cocoa, 1/2 cup powdered sugar, 1/2 cup flour, and 1/4 teaspoon kosher salt over the butter mixture. Using a rubber spatula or wooden spoon, fold until glossy and uniform. Avoid overmixing to keep the filling fudgy rather than cakey.Add chips and nuts:Fold in 1/2 cup semisweet chips and 1/4 cup finely chopped walnuts (if using) until distributed. The chips will soften but keep pockets of melted chocolate after baking.Fill the crust and tent with foil:Pour the batter into the frozen pie shell and smooth the top with a spatula. Lightly spray a sheet of foil with nonstick spray and tent it over the pie without pressing onto the batter; this prevents direct heat from browning too fast while ensuring the center sets.Bake covered then uncovered:Bake on the lower rack covered for 25 minutes. Carefully remove the foil and bake an additional 20–30 minutes uncovered depending on desired set: 20–25 minutes yields a fudgier center, 30 minutes yields a firmer, sliceable pie. Look for a slightly puffed center that has lost some jiggle and a glossy top with a few small cracks.Cool and serve:Transfer the pie to a wire rack and cool to room temperature. Serve warm with ice cream for a melty experience, or chill for firmer slices. The colder the pie, the more set it becomes.
You Must Know
- This dessert stores well: refrigerated in an airtight container for up to 5 days; slices freeze for up to 3 months — wrap each slice tightly in plastic and foil to prevent freezer burn.
- Nutritionally it’s an indulgent treat: higher in calories and sugar, so enjoy in portions or pair with fresh fruit to balance richness.
- Texture control is simple: shorter final bake time for fudgy, longer for sliceable. Using an instant-read thermometer, 200–205°F in the center indicates a set filling without overbaking.
- Allergen note: contains eggs, dairy, gluten and potentially nuts depending on add-ins — make substitutions if needed for guests with restrictions.
My favorite aspect is the versatility: I’ve served this pie warm at winter gatherings and chilled at summer potlucks. One summer I packed a chilled pie for a beach picnic; the chilled slices were clean and easy to transport, and everyone loved the dense chocolate flavor. It’s rescued many last-minute celebrations and has become my go-to when I want to impress with minimal effort.
Storage Tips
Store leftovers in the refrigerator in an airtight container to maintain texture and prevent drying; cooled slices firm up and are easier to cut cleanly. For longer storage, freeze individual slices on a baking sheet until solid, then wrap each slice in plastic wrap followed by foil and store in a freezer-safe bag for up to 3 months. To thaw, move slices to the refrigerator overnight, then bring to room temperature or warm briefly in a 300°F oven for 8–10 minutes. Avoid leaving the pie at room temperature more than two hours to preserve freshness and food safety.
Ingredient Substitutions
If you need to modify the ingredient list, there are easy swaps that keep the character of the dish. For a dairy-free version, use a vegan butter substitute and dairy-free chocolate chips — this affects flavor slightly but preserves the fudgy texture. To make it nut-free, omit walnuts or swap for toasted sunflower seeds for crunch. For a sweeter profile, swap semisweet chips for milk chocolate; for a darker, more intense bite, use 60–70% dark chocolate chunks. If you need a gluten-free pie crust, choose a certified gluten-free frozen crust — fill and bake times remain the same but watch browning as some GF crusts brown faster.
Serving Suggestions
Serve warm with a scoop of vanilla ice cream and a drizzle of hot fudge for an indulgent contrast of temperatures and textures. For an elegant dessert, dust the top lightly with powdered sugar and garnish with a few whole toasted walnuts or a sprig of mint. Pair slices with freshly brewed coffee, espresso, or a dessert wine such as tawny port. For a lighter presentation, serve small wedges with macerated berries and a dollop of lightly sweetened whipped cream.
Cultural Background
The concept of baking chocolate batter in a pie shell is an American home-cooking innovation that blends two comfort traditions: the brownie and the pie. Brownies themselves date back to late 19th/early 20th century America and have countless regional variations. Turning brownie batter into a pie creates an approachable, shareable dessert that reflects practical home baking — using a single pan, fewer utensils, and a friendly presentation for family-style eating. Over time, this hybrid has become a staple at potlucks, holiday tables, and casual dinners where convenience and decadence are both prized.
Seasonal Adaptations
Adapt this recipe to the season: in autumn fold in chopped roasted pecans and a pinch of cinnamon for warmth; in winter top with salted caramel sauce for holiday indulgence; in spring and summer serve chilled with a bright berry compote to cut richness. For holiday gatherings, add a tablespoon of espresso powder to the batter to deepen chocolate notes and pair with salted caramel and toasted nuts for texture and contrast.
Meal Prep Tips
Make the filling up to a day ahead and keep it chilled in the refrigerator; fill the frozen crust and bake when ready to serve. Alternatively, bake the pie a day ahead, chill, and slice before serving — chilled slices are easier to package for gifting or transport. Use rigid, vented containers when transporting a warm pie to prevent soggy tops from trapped steam. If you’re prepping multiple pies for a party, stagger baking so each pie is fresh and warm when guests arrive.
This brownie pie is my little shortcut to big chocolate flavor with minimal fuss. It’s approachable, flexible, and reliably loved — perfect for everyday dessert or special occasions. Make it yours by adjusting sweetness, nuts, and toppings to match your crowd, and enjoy the way a simple technique can elevate pantry staples into something memorable.
Pro Tips
Let the hot melted butter sit briefly with granulated sugar to help create a glossy, crackly top—this small step makes a big difference.
For fudgier slices, remove the pie on the earlier end of the uncovered bake time; for cleaner slices, bake until the center is firm.
Chill the pie before slicing if you need neat portions for serving or packaging; a cold pie slices much cleaner than a warm one.
Use good-quality chocolate chips (Ghirardelli, Guittard) for pockets of melty chocolate rather than lower-quality chips that can taste waxy.
This nourishing decadent brownie pie recipe is sure to be a staple in your kitchen. Enjoy every moist, high protein slice — it is perfect for breakfast or as a wholesome snack any time.
Tags
Decadent Brownie Pie
This Decadent Brownie Pie recipe makes perfectly juicy, tender, and flavorful steak every time! Serve with potatoes and a side salad for an unforgettable dinner in under 30 minutes.
Ingredients
Base
Dry ingredients
Add-ins & toppings
Instructions
Preheat and prepare
Preheat oven to 350°F and place a rack in the lower third. Keep the frozen pie crust in its tin; do not thaw before filling.
Combine sugar and hot butter
Pour hot melted butter over granulated sugar in a large bowl, stir briefly, then let sit for 5 minutes so heat begins dissolving sugar. Whisk vigorously for 30 seconds after resting.
Add eggs, water and vanilla
Whisk in 1 large egg, 1 large egg yolk, 1 tablespoon water and 1 1/2 teaspoons vanilla until smooth, about 30 seconds. Remove whisk to avoid overworking.
Fold in dry ingredients
Sprinkle cocoa, powdered sugar, flour and salt over the wet mixture and fold with a spatula until glossy and combined; avoid overmixing.
Add chips and nuts
Fold in chocolate chips and finely chopped walnuts (if using) so they are evenly distributed throughout the batter.
Fill crust and tent with foil
Pour batter into the frozen pie shell and smooth the surface. Lightly spray foil with nonstick spray and tent it over the pie without pressing onto the batter.
Bake covered then uncovered
Bake covered on the lower rack for 25 minutes. Remove foil carefully and bake uncovered another 20–30 minutes depending on desired fudginess. Center should be slightly set with a glossy, crackly top.
Cool and serve
Cool on a wire rack to room temperature. Serve warm with ice cream or chilled for firmer slices; refrigerate for up to 5 days.
Last Step: Please leave a rating and comment letting us know how you liked this recipe! This helps our business to thrive and continue providing free, high-quality recipes for you.
Nutrition
Did You Make This?
Leave a comment & rating below or tag
@cravele on social media!
Categories:
You might also like...

Fudgy Marshmallow Brownies
Ultra-fudgy brownies studded with chocolate chunks, crowned with gooey marshmallows and a quick cocoa icing for irresistible, crowd-pleasing decadence.

Buttery Pecan Pie Bars
Buttery shortbread crust topped with a gooey brown sugar pecan filling. Easy, crunchy, and truly irresistible with just 10 minutes of prep.

Silky No-Crack Pumpkin Cheesecake
Silky pumpkin cheesecake with a spiced graham crust, no cracks, effortless mixing, and decadent caramel and rum whipped cream for unforgettable holiday celebrations.
Did You Make This?
Leave a comment & rating below or tag @cravele on social media!
Rate This Recipe
Share This Recipe
Enjoyed this recipe? Share it with friends and family, and don't forget to leave a review!
Comments (1)
This recipe looks amazing! Can't wait to try it.
Comments are stored locally in your browser. Server comments are displayed alongside your local comments.

Hi, I'm Emily!
What's Popular

30-Minute Meals!
Join to receive our email series which contains a round-up of some of our quick and easy family favorite recipes.