
>>

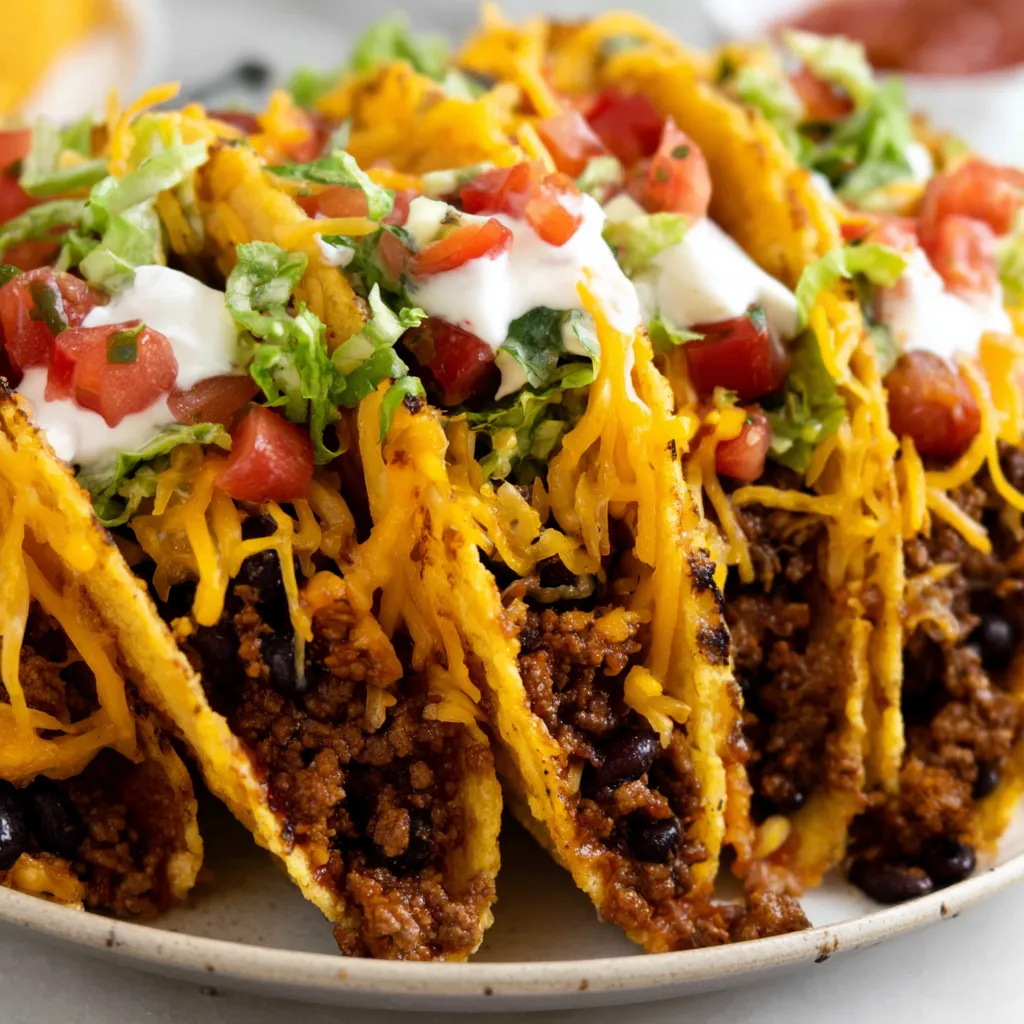
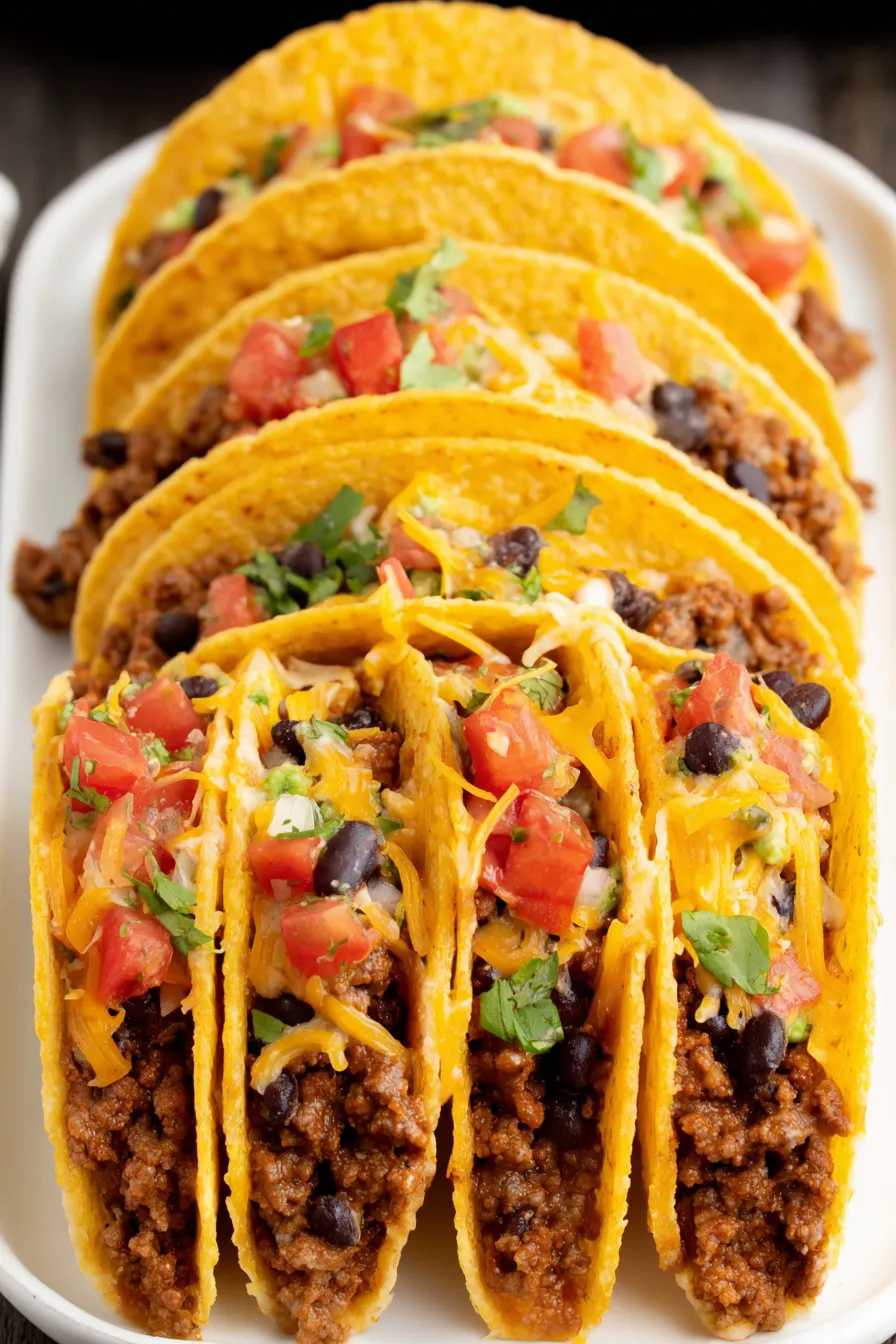
A fast, family-friendly tray of baked tacos: crunchy shells filled with seasoned beef and beans, finished with melted cheddar and your favorite toppings.
This tray of baked tacos became my go-to weeknight solution the first winter I was balancing work, homework help, and barely-cleaned backpacks. I discovered this assembly-style method when I wanted the crispness of a hard taco without standing at the stove filling one shell at a time. The result delivers a perfectly crisp shell with juicy, well-seasoned meat and a creamy note from a little softened cream cheese—comforting, familiar, and reliably loved by kids and adults alike.
What makes it special is the easy assembly and the way the oven does most of the work: the shells briefly heat to become pliable and stand upright in a casserole dish, then hold a bed of black beans and a spoonful of seasoned beef. The top layer of cheddar melts into golden pockets where it meets the hot filling. Texturally, you get a mix of crisp shell, tender beef, and a creamy counterpoint from toppings like avocado or sour cream. We always pull a few extras from the oven minutes early for the lovers of slightly softer shells and keep the rest crisp for crunch fans.
Personally, my favorite memory with this dish is a rainy Sunday when neighbors dropped by with board games. The tray of baked tacos disappeared faster than we could deal hands. My teenagers still ask for this when friends come over because it feels casual yet elevated—easy to serve for a crowd but made with a little flair.

One of my favorite parts of the recipe is how flexible it is: the kids love customizing toppings and my husband always goes for extra melted cheese. At a small dinner party, I double the filling and use two dishes—one keeps the crunchier shells, the other is removed sooner for softer shells, which accommodates everyone’s preferences. Every time I serve these, someone asks for the recipe and how to make it even quicker, which is why the prep-ahead tip has become a family hack.
Store cooled leftovers in a shallow, airtight container to cool quickly and prevent bacterial growth. Refrigerate for up to 3 days; to reheat, preheat the oven to 350°F and heat for 8–10 minutes until warm through and the cheese begins to bubble again—this restores some crispness. Do not store filled shells at room temperature for more than two hours. If you've made extra filling, freeze it in freezer-safe containers for up to 3 months; thaw overnight in the refrigerator before reheating gently in a skillet with a splash of broth.
If you prefer poultry, substitute 1 lb ground chicken or turkey—brown the meat and add 1 tablespoon olive oil if it seems dry. For vegetarian options, replace the ground beef with a crumbled firm tofu mixture or a plant-based ground substitute and increase spices for depth. Swap cream cheese for a dollop of plain Greek yogurt at the end to keep creaminess while reducing fat. Use pepper jack or Monterey Jack for a milder melt instead of sharp cheddar. If you require gluten-free certification, use certified corn shells and check the taco seasoning label for hidden wheat.
Serve with a crisp green salad or a simple cilantro-lime rice to round out the meal. A light side of charred corn salad or pickled red onions adds acidity that cuts through the richness. For gatherings, present a toppings bar with bowls of shredded lettuce, chopped tomato, pickled jalapeños, salsa, sour cream, shredded cheese, and sliced avocado so guests tailor each taco. Garnish with a squeeze of lime and chopped cilantro for brightness.
These baked tacos are an Americanized convenience take inspired by traditional Mexican hard-shell tacos. The concept of baking assembled tacos to melt cheese and heat fillings emerged for fast family meals, blending the convenience of canned ingredients and oven efficiency with classic taco flavors like cumin, chili, and garlic. Similar tray-style approaches exist across home kitchens where speed and crisp texture are prized.
In summer, bulk up with charred fresh corn and diced tomatoes instead of canned. For winter, swap in roasted sweet potato cubes and black beans for a cozy vegetarian version, or add a splash of smoky chipotle in adobo to the meat for deeper warmth. Holiday gatherings can be elevated by mixing in roasted poblano peppers and topping with crumbled queso fresco.
Make the filling two days ahead and store in the refrigerator; just reheat and assemble when ready. Portion the filling into single-serving containers for quick lunches that can be warmed in a skillet. Pre-shred cheese and store in a resealable bag with a sprinkle of cornstarch to prevent clumping. When prepping for a crowd, set the oven to 400°F and rotate two baking dishes to keep assembly flowing without cooling down the baking oven.
These baked tacos strike a balance between comfort and convenience—easy enough for weeknights, impressive enough for company. I hope they become one of your reliable dinners, too. Invite friends, set up a toppings bar, and enjoy the satisfying crunch and melty cheese that make this dish a simple pleasure.
Drain and pat the black beans dry to prevent soggy shells.
Pre-bake shells in a light-colored dish for 5 minutes or 3 minutes in a dark dish to avoid over-browning.
Use freshly shredded cheddar for better melting and texture.
Simmer the meat mixture until most liquid evaporates so the filling is moist but not watery.
Assemble toppings in bowls so guests personalize each taco and you minimize assembly time.
This nourishing crispy baked tacos recipe is sure to be a staple in your kitchen. Enjoy every moist, high protein slice — it is perfect for breakfast or as a wholesome snack any time.
Yes. Use ground chicken or turkey in the same quantity and cook until no pink remains. Add a tablespoon of oil if the meat is very lean.
Refrigerate in an airtight container for up to 3 days; reheat in a 350°F oven for 8–10 minutes to restore crispness.
This Crispy Baked Tacos recipe makes perfectly juicy, tender, and flavorful steak every time! Serve with potatoes and a side salad for an unforgettable dinner in under 30 minutes.
Drain and rinse 1 cup black beans and place on a paper towel to briefly dry to avoid excess moisture in the shells.
Preheat oven to 400°F. Arrange 8–10 hard taco shells in a 9 x 13 inch casserole dish so they stand upright. Bake for 5 minutes in a light-colored dish or 3 minutes in a dark dish.
In a large skillet over medium-high heat, cook 1 lb ground beef with 1 finely diced yellow onion until beef is browned and onion softened, about 8–10 minutes. Drain excess grease.
Stir in 1 oz taco seasoning, 10 oz undrained diced tomatoes with green chilies, and 1/4 cup beef broth. Bring to a boil 1–2 minutes, then simmer until most liquid evaporates. Stir in 1 tablespoon softened cream cheese until combined.
Place a spoonful of black beans in the bottom of each shell, top with the meat mixture, and sprinkle evenly with 1 1/4 cups shredded cheddar cheese.
Bake uncovered at 400°F for 7–10 minutes until cheese is melted and shells are crisp. Remove from oven, add toppings like salsa, sour cream, shredded lettuce, or diced avocado, and serve immediately.
Last Step: Please leave a rating and comment letting us know how you liked this recipe! This helps our business to thrive and continue providing free, high-quality recipes for you.
Leave a comment & rating below or tag
@cravele on social media!

Ultra-fudgy brownies studded with chocolate chunks, crowned with gooey marshmallows and a quick cocoa icing for irresistible, crowd-pleasing decadence.

Buttery shortbread crust topped with a gooey brown sugar pecan filling. Easy, crunchy, and truly irresistible with just 10 minutes of prep.

Silky pumpkin cheesecake with a spiced graham crust, no cracks, effortless mixing, and decadent caramel and rum whipped cream for unforgettable holiday celebrations.
Leave a comment & rating below or tag @cravele on social media!
Enjoyed this recipe? Share it with friends and family, and don't forget to leave a review!
This recipe looks amazing! Can't wait to try it.
Comments are stored locally in your browser. Server comments are displayed alongside your local comments.

Join to receive our email series which contains a round-up of some of our quick and easy family favorite recipes.
