
>>

A simple, ultra-creamy Parmesan pasta made with butter, garlic, and freshly grated cheese — ready in about 20 minutes and perfect for weeknights.
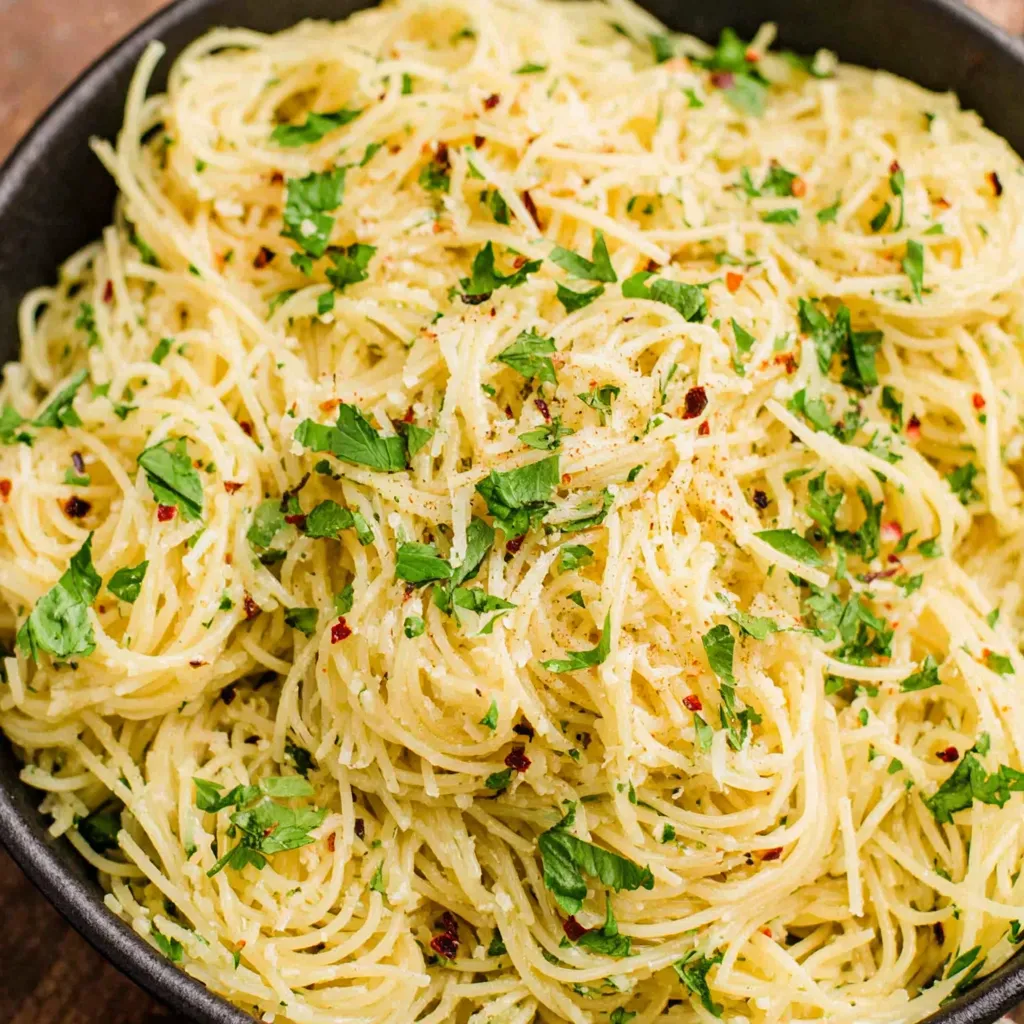
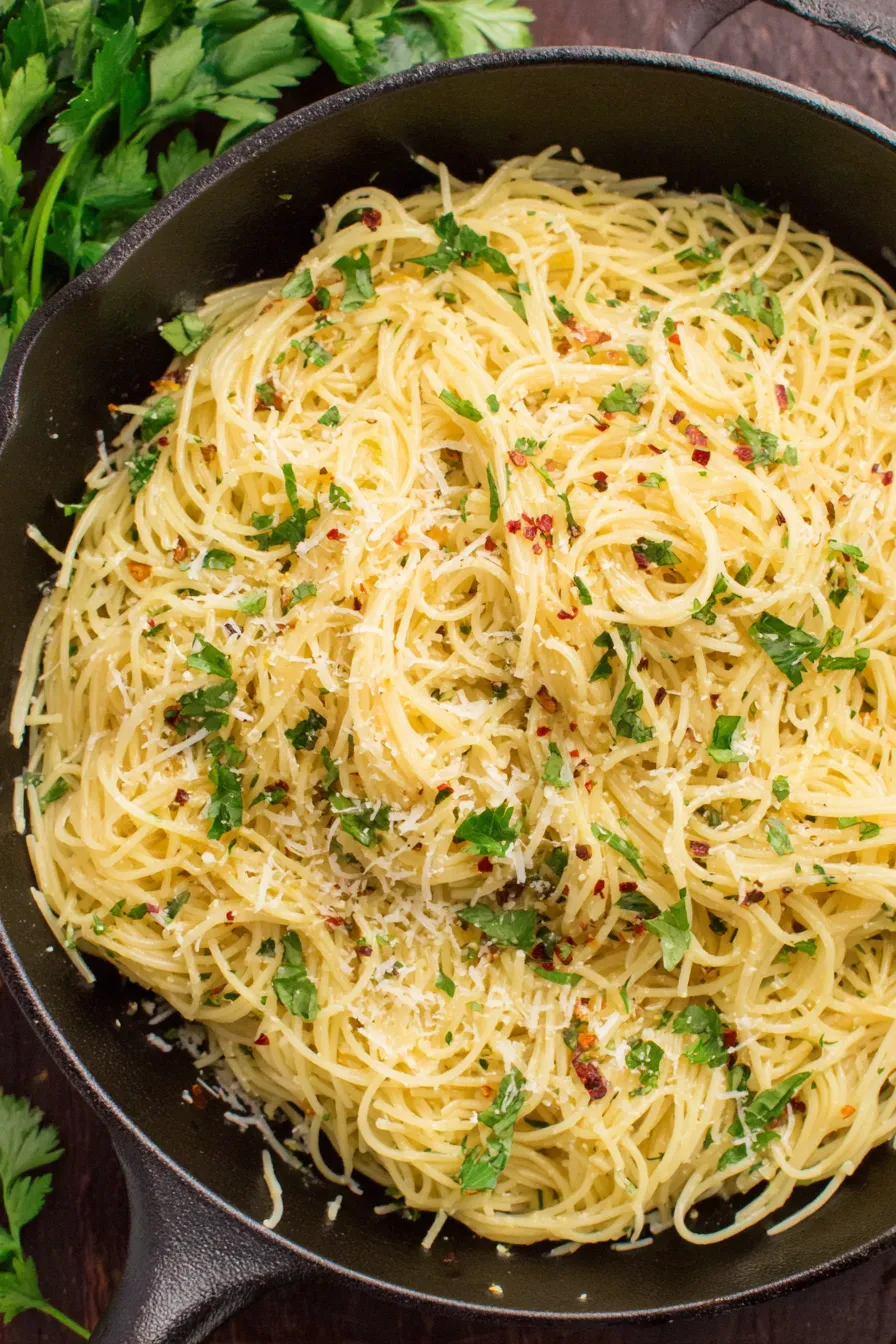
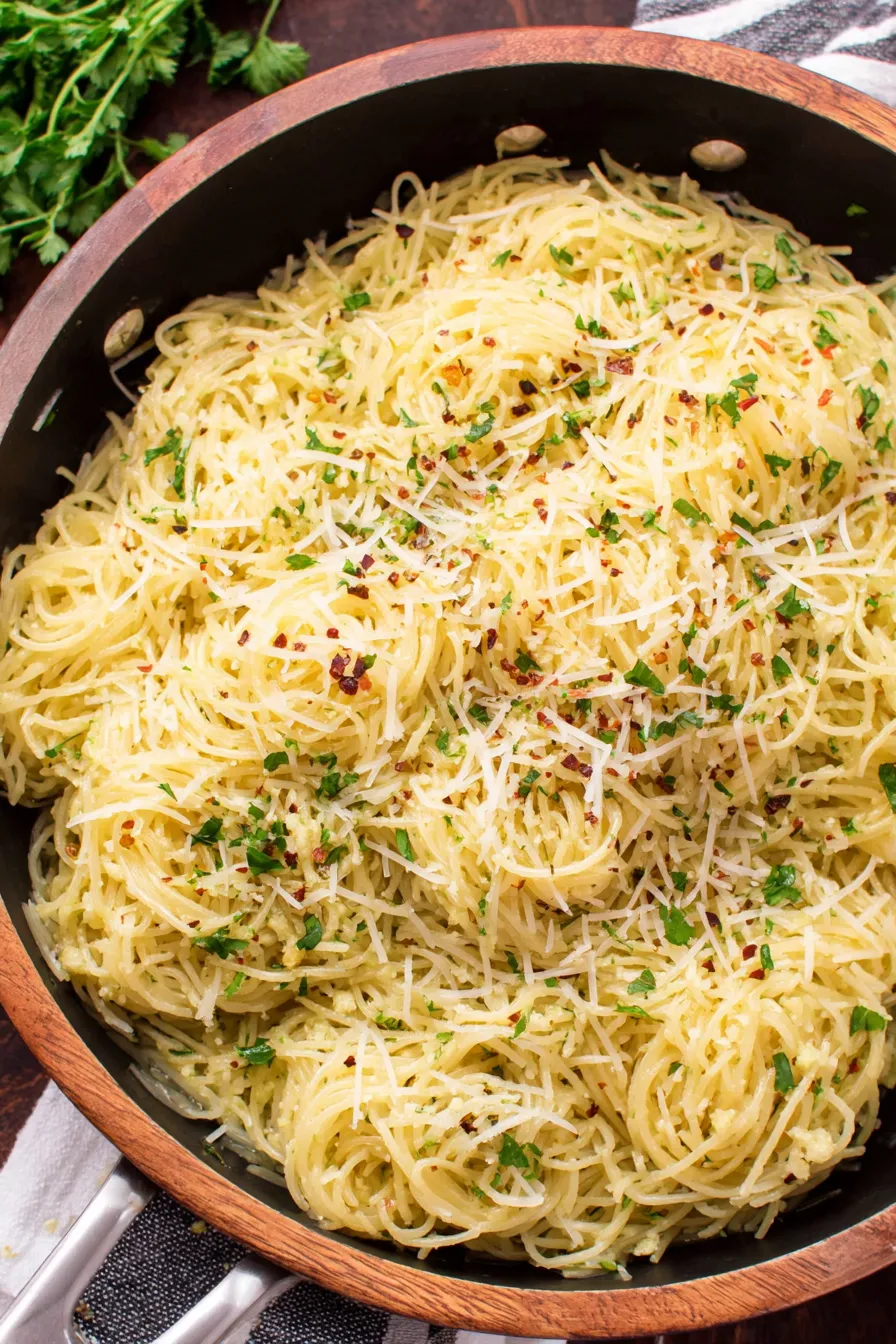
This Parmesan noodle dish is the kind of simple comfort food that becomes part of your regular rotation almost by accident. I first made it on a rainy weeknight when the fridge held a lonely slab of butter, a handful of grated cheese, and a box of angel hair. The combination of warm, silky butter coating delicate pasta, bright garlic aroma, and the nutty tang of freshly grated Parmesan instantly felt like a hug in a bowl. It’s a humble plate that always brings people to the table — elegant enough for company, comforting enough for a solo indulgent dinner.
What makes this version special is the attention to small details: finely minced garlic cooked gently so it becomes aromatic without turning bitter, just the right ratio of cheese to pasta for a glossy finish rather than a clumpy paste, and a fresh hit of parsley for balance. I love how flexible it is — use angel hair when you want something light and ethereal, or switch to spaghetti for more tooth. It’s quick, forgiving, and every time I make it someone asks for the recipe.
I remember the first time I served this to neighbors after a long day of moving; the simplicity made conversation easier and everyone loved it. The dish disappears fast, and I often get messages later asking if there’s any left — which there rarely is. Over the years I’ve tweaked the garlic timing and the toss technique until the sauce is consistently glossy and clingy rather than pasty. That little victory felt worth the few extra attempts.
My favorite part is the immediate comfort it delivers: the first forkful is rich and buttery, but the parsley and pepper wake up the palate. When I make this for friends, it often sparks stories about their simplest, most memorable meals — there’s something about plain, well-made food that invites conversation. Over the years I’ve taught this to busy housemates as a foundational technique: how to coax flavor from a few high-quality ingredients with careful timing.
Store leftovers in an airtight container in the refrigerator for up to 3 days. For best results when reheating, place the pasta in a skillet over low heat with a tablespoon of water, milk, or olive oil and stir gently until loosened — avoid microwaving at high power, which can make the cheese seize and the pasta dry. If you made a large batch, portion it into shallow containers so it cools faster and reheats evenly. Check aroma and texture before serving; off smells or slimy texture indicate it should be discarded.
If you need to adjust ingredients, here are reliable swaps: use 8 ounces of spaghetti or linguine instead of angel hair for more bite; swap the salted butter for unsalted plus an extra pinch of salt if you prefer precise seasoning control. For cheese, Parmigiano-Reggiano gives the most complex flavor, while Romano and Asiago offer sharper notes. For a lighter version, reduce the butter to 2 tablespoons and add 2 tablespoons of olive oil, though the mouthfeel will be noticeably different. For a dairy-free option, use a vegan butter and a grated plant-based hard cheese, keeping in mind texture will differ.
Serve alongside a crisp green salad dressed with lemon vinaigrette to cut the richness, or pair with roasted vegetables like asparagus or broccolini for color and texture. For a heartier meal, add sliced grilled chicken, sautéed shrimp, or pan-seared mushrooms. Garnish with extra Parm, a sprinkle of chopped parsley, and a final crack of black pepper. Present in shallow bowls so each portion keeps its glossy sheen and looks inviting on the table.
This style of simple butter-and-cheese pasta traces its roots to rustic Italian cucina, where minimal ingredients are combined to highlight quality. Similar dishes include pasta al burro in northern Italy and cacio e pepe from Rome, which pairs cheese with pepper alone. The appeal lies in technique — gentle heat, good cheese, and perfect seasoning — rather than complexity. Over time this approach has become a global pantry classic, adaptable to local cheeses and pasta shapes while preserving the core idea: deliciousness from simplicity.
In spring, stir in peas and lemon zest for brightness; in summer add cherry tomatoes and basil for freshness; in autumn toss with roasted squash and sage for earthiness; and in winter serve with wilted spinach and toasted walnuts for warmth and crunch. Small seasonal additions let you transform the basic pan into a dish suited to holidays or weeknight rhythms without changing technique.
To prep ahead, grate the cheese and chop the parsley the day before, and mince the garlic into a small airtight jar to prevent flavor transfer. Cook the pasta to al dente, toss lightly with a drizzle of oil, and refrigerate in shallow containers for up to 24 hours; when ready, rewarm in a skillet with the butter and freshly sautéed garlic and finish with cheese. Portion into single-serve containers for quick lunches that reheat easily.
Simple food can be deeply satisfying — this plate proves it. Whether you need comfort, speed, or a crowd-pleasing side, these noodles deliver every time. Make it your own, and you’ll find it becomes one of those beloved go-to dishes at home.
Grate the cheese fresh from a wedge — it melts smoother and tastes brighter than pre-grated cheese.
Cook garlic over medium-low heat and remove as soon as it becomes aromatic to avoid bitterness.
Toss the pasta with cheese off the heat; too much direct heat after adding cheese can make the sauce grainy.
Reserve a small amount of pasta water to adjust sauce consistency if needed.
Use tongs to toss rather than stirring vigorously to keep strands from clumping.
This nourishing creamy parmesan noodles recipe is sure to be a staple in your kitchen. Enjoy every moist, high protein slice — it is perfect for breakfast or as a wholesome snack any time.
Yes — reserve a few tablespoons of the pasta cooking water before draining. Add it a little at a time if the pasta and cheese seem dry; the starch helps create a glossy sauce.
Store in an airtight container in the refrigerator for up to 3 days. Reheat gently with a splash of water or milk to restore creaminess.
This Creamy Parmesan Noodles recipe makes perfectly juicy, tender, and flavorful steak every time! Serve with potatoes and a side salad for an unforgettable dinner in under 30 minutes.
Bring a large pot of salted water to a boil and cook 8 ounces of pasta to al dente according to package instructions. Reserve 2–4 tablespoons of cooking water and drain the pasta.
In a 10–12 inch skillet over medium-low heat, melt 4 tablespoons of salted butter until just foamy but not browned.
Add 1½ tablespoons of finely minced garlic and stir constantly for about 45–60 seconds until aromatic, taking care not to brown it.
Add drained pasta to the skillet and toss with tongs until fully coated; add a splash of reserved pasta water if necessary to loosen the sauce.
Sprinkle ¾ cup freshly grated Parmesan, 1 tablespoon chopped parsley, ½ teaspoon kosher salt, and ½ teaspoon freshly cracked black pepper. Toss off the heat until glossy.
Remove from heat, drizzle with 1 tablespoon extra virgin olive oil if desired, add red pepper flakes to taste, and serve immediately with extra Parmesan.
Last Step: Please leave a rating and comment letting us know how you liked this recipe! This helps our business to thrive and continue providing free, high-quality recipes for you.
Leave a comment & rating below or tag
@cravele on social media!

Ultra-fudgy brownies studded with chocolate chunks, crowned with gooey marshmallows and a quick cocoa icing for irresistible, crowd-pleasing decadence.

Buttery shortbread crust topped with a gooey brown sugar pecan filling. Easy, crunchy, and truly irresistible with just 10 minutes of prep.

Silky pumpkin cheesecake with a spiced graham crust, no cracks, effortless mixing, and decadent caramel and rum whipped cream for unforgettable holiday celebrations.
Leave a comment & rating below or tag @cravele on social media!
Enjoyed this recipe? Share it with friends and family, and don't forget to leave a review!
This recipe looks amazing! Can't wait to try it.
Comments are stored locally in your browser. Server comments are displayed alongside your local comments.

Join to receive our email series which contains a round-up of some of our quick and easy family favorite recipes.
