
>>

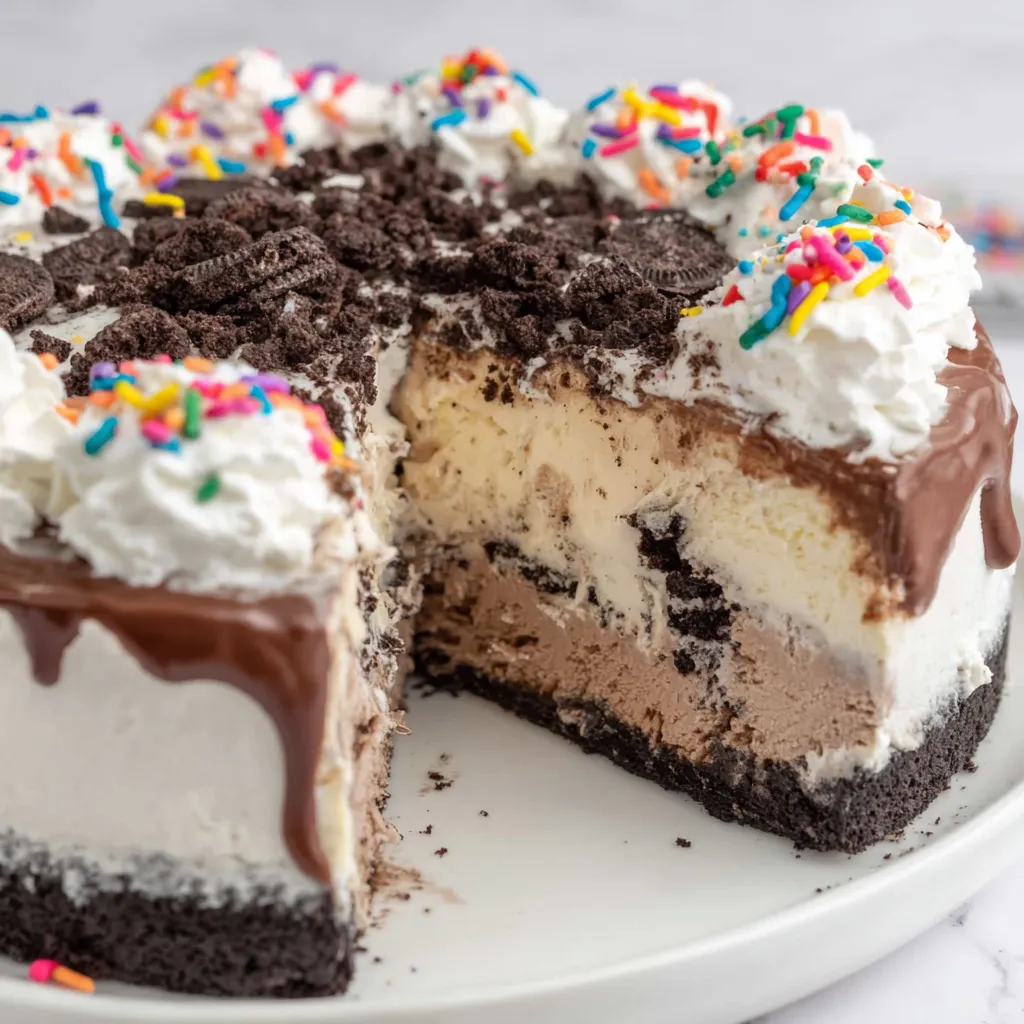
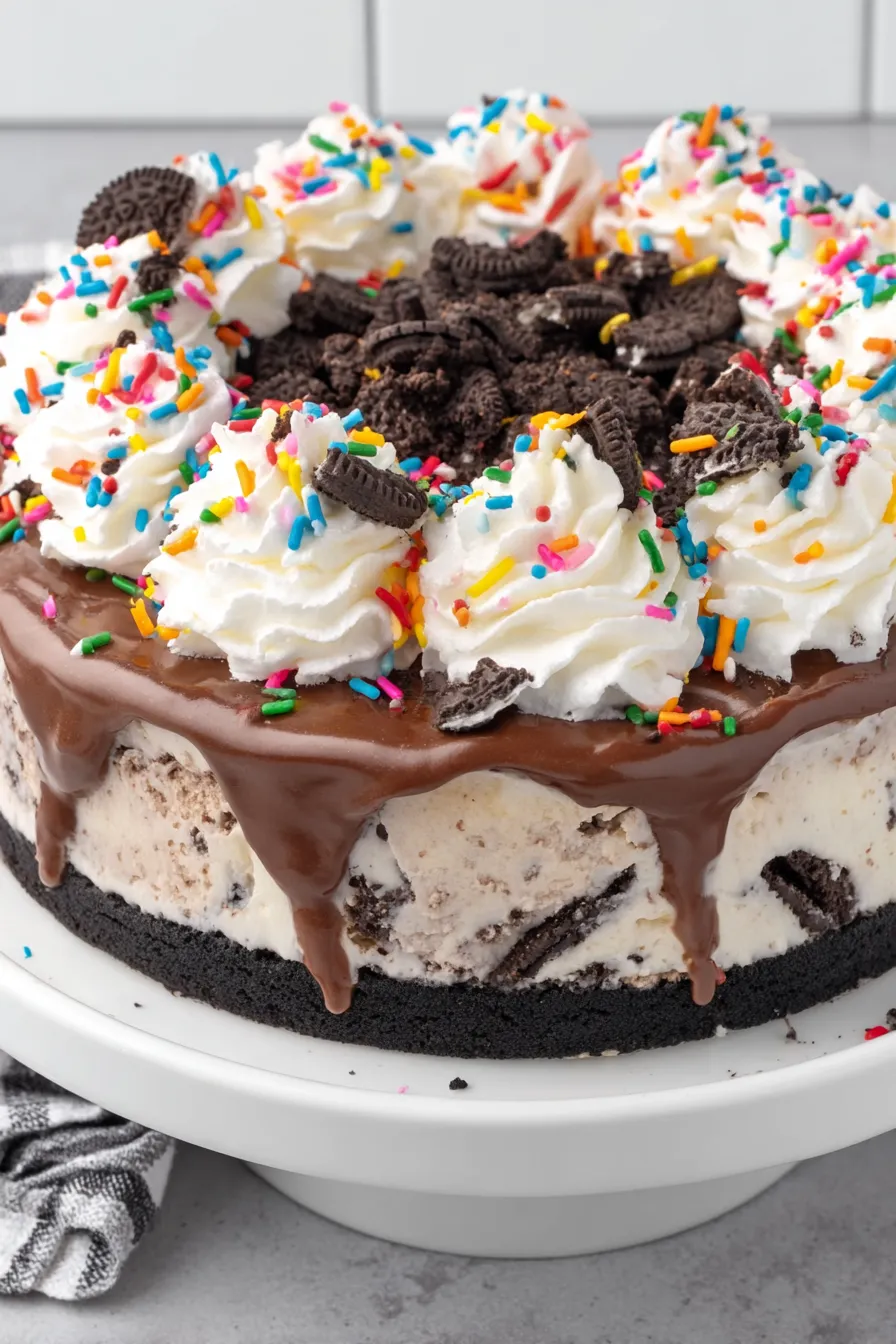
Celebrate any occasion with this easy copycat Dairy Queen ice cream cake — layers of cookie crunch, chocolate and vanilla ice cream, hot fudge, and cloud-like whipped cream frosting.
This cake has been my party go-to for years: a nostalgic, celebratory dessert that blends childhood memories with grown-up attention to texture. I first recreated this version during a backyard birthday when the grocery stores were sold out of pre-made ice cream cakes. The result tasted even better than the packaged ones — crisp chocolate cookie crunch, dense chocolate ice cream, a glossy ribbon of hot fudge, and the lightest whipped cream frosting. Everyone at the party kept asking how I made it and whether I could bring another the next weekend.
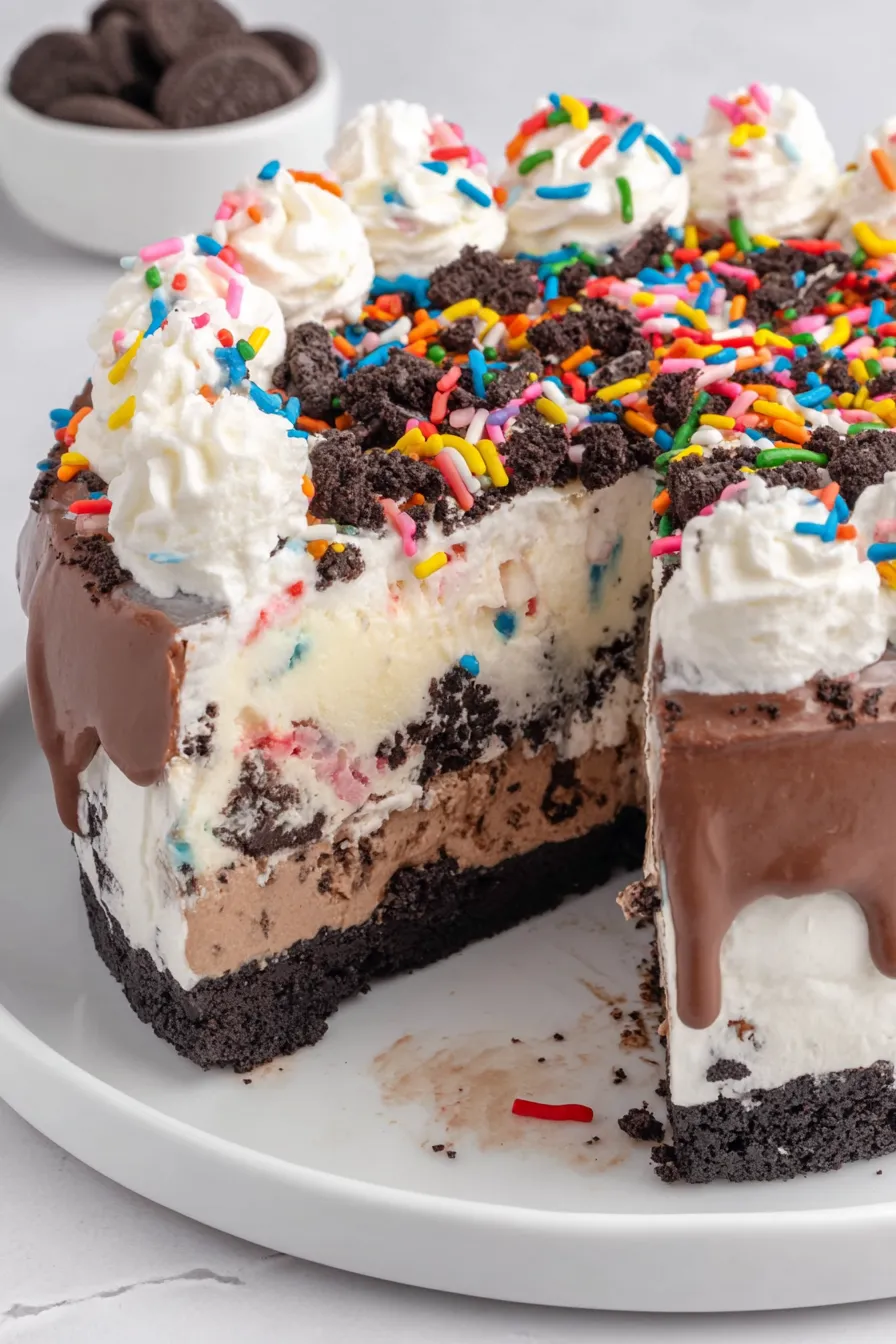
What makes this version special is the balance between the crunchy cookie base and the two distinct ice cream layers, bridged by warm-for-a-moment hot fudge that sets into a satisfying layer. I use vanilla bean ice cream for a real flecked vanilla flavor, and I always bake the cookie crumb base briefly to deepen the chocolate notes and remove any raw-cookie taste. There’s a practical magic here: you can assemble most of the cake ahead of time, freeze it, then frost and decorate minutes before serving for a show-stopping finish.
In my experience, this cake disappears faster than any frosted layer cake at family gatherings. My kids insist on watching me warm the hot fudge; they call that the "melty part." Over the years I’ve learned a few timing tricks to keep the assembly smooth and the layers tidy — I’ll share those below so your cake comes out clean and confident every time.
My favorite thing about this version is how easily it bridges elegant presentation with simple assembly. At a holiday potluck, someone once mistook it for a bakery cake until they sliced it and were delighted by the homemade hot-fudge ribbon. It’s a recipe I return to whenever I want dessert to feel like a celebration without spending hours in the kitchen.
Wrap the cake tightly in plastic wrap and then a layer of aluminum foil before placing it back in the freezer to avoid odor transfer and freezer burn. Store for up to 3 months; for best flavor and texture, eat within 1 month. When ready to serve, transfer to the refrigerator for 20–30 minutes or let sit at room temperature for 10–15 minutes to soften slightly for cleaner slices. If you’ll be transporting the cake, place it on a chilled board and keep it in a cooler with ice packs until ready to present.
For a gluten-free version, use certified gluten-free chocolate sandwich cookies and confirm the hot fudge is gluten-free. For dairy-free or vegan adaptations, use dairy-free ice creams (coconut- or almond-based), vegan sandwich cookies, and dairy-free whipped topping — note the texture and freezing behavior will differ, and the whipped topping may not hold as well when piping. Swap chocolate for strawberry ice cream for a summery twist, or use coffee ice cream in place of chocolate for a mocha variation. Keep in mind that lower-fat ice creams can become icy; premium, higher-fat brands yield the creamiest result.
Serve each slice with a drizzle of warmed hot fudge or a dusting of cocoa powder for an extra flourish. Complement slices with fresh berries for balance — raspberries and strawberries add bright acidity against the dessert’s richness. For a party, place pre-sliced pieces on chilled plates to keep them firm while serving. Garnish with toasted chopped nuts for texture contrast, or pair with espresso for an adult pairing.
The classic iced cake concept blends American party-tradition convenience with the texture play of European frozen desserts. The copycat approach celebrates nostalgia — Dairy Queen popularized this layered frozen treat in the late 20th century, and home cooks quickly adapted it for celebrations. The combination of a cookie crumb base and whipped topping echoes icebox cakes from mid-century Americana, modernized by using premium ice cream and piping techniques for a contemporary finish.
In summer, swap the chocolate layer for fruity sorbets and the hot fudge for a berry coulis that sets slightly between layers. For the holidays, stir crushed peppermint into the cookie crumbs and sprinkle crushed candy canes on top. For a patriotic Fourth of July version, use strawberry and blueberry ice creams and red-white-blue sprinkles. Adjust the flavors while keeping the basic assembly for reliable results across seasons.
Assemble the internal layers (cookie crumb, chocolate ice cream, hot fudge, cookie crumbs, vanilla) up to 24 hours ahead and keep the cake frozen. Whip the frosting just before serving — it takes only minutes if the bowl and cream are very cold. If piping in advance, pipe and keep chilled for no more than 2 hours to avoid weeping; otherwise, pipe as the final flourish immediately before guests arrive.
Make this recipe your own: experiment with different ice cream brands and mix-ins, and adjust the hot fudge amount to suit how thick you prefer that ribbon of flavor. There’s something joyful about creating a frozen centerpiece that tastes of comfort and celebration. Enjoy, and don’t forget to save a corner slice for later.
Chill mixing bowl and beaters for 30 minutes before whipping cream to achieve stiff peaks faster.
Microwave the hot fudge in short 20–25 second bursts until just pourable; overheating makes it runny.
Allow the cake to sit 10–15 minutes at room temperature before slicing for clean cuts with a warm knife.
Bake the cookie crumbs briefly to intensify flavor and prevent a raw cookie taste.
Use an offset spatula chilled in cold water, then dried, to smooth whipped cream more quickly.
This nourishing copycat dairy queen ice cream cake recipe is sure to be a staple in your kitchen. Enjoy every moist, high protein slice — it is perfect for breakfast or as a wholesome snack any time.
This Copycat Dairy Queen Ice Cream Cake recipe makes perfectly juicy, tender, and flavorful steak every time! Serve with potatoes and a side salad for an unforgettable dinner in under 30 minutes.
Line a 9-inch springform pan with plastic wrap and a 10×15-inch baking sheet with parchment paper. This prevents sticking and makes removal simple.
Combine crushed sandwich cookies with melted butter until evenly coated and crumbly, then spread on the lined baking sheet.
Bake at 350°F for 7–8 minutes to toast the crumbs; cool completely before using to avoid melting the ice cream.
Let chocolate ice cream soften for 15–20 minutes. Press an even layer into the bottom of the prepared pan and freeze 30–60 minutes.
Microwave hot fudge for 20–25 seconds to loosen, then spread evenly over the chilled chocolate ice cream layer. Work quickly so warm fudge doesn't melt ice cream.
Sprinkle cooled baked cookie crumbs over the fudge layer, press lightly, then return the pan to the freezer for 1 hour.
Soften vanilla ice cream for 15–20 minutes and spread it over the cookie crumb layer. Freeze for 4–6 hours or overnight for best firmness.
Chill mixing bowl, then beat heavy cream, powdered sugar, and clear vanilla until stiff peaks form. Reserve 1 cup in a piping bag for decoration.
Remove springform ring, lift cake onto a serving board, quickly frost sides and top with whipped cream, pipe border, add sprinkles, and return to freezer until serving.
Last Step: Please leave a rating and comment letting us know how you liked this recipe! This helps our business to thrive and continue providing free, high-quality recipes for you.
Leave a comment & rating below or tag
@cravele on social media!

Ultra-fudgy brownies studded with chocolate chunks, crowned with gooey marshmallows and a quick cocoa icing for irresistible, crowd-pleasing decadence.

Buttery shortbread crust topped with a gooey brown sugar pecan filling. Easy, crunchy, and truly irresistible with just 10 minutes of prep.

Silky pumpkin cheesecake with a spiced graham crust, no cracks, effortless mixing, and decadent caramel and rum whipped cream for unforgettable holiday celebrations.
Leave a comment & rating below or tag @cravele on social media!
Enjoyed this recipe? Share it with friends and family, and don't forget to leave a review!
This recipe looks amazing! Can't wait to try it.
Comments are stored locally in your browser. Server comments are displayed alongside your local comments.

Join to receive our email series which contains a round-up of some of our quick and easy family favorite recipes.
