
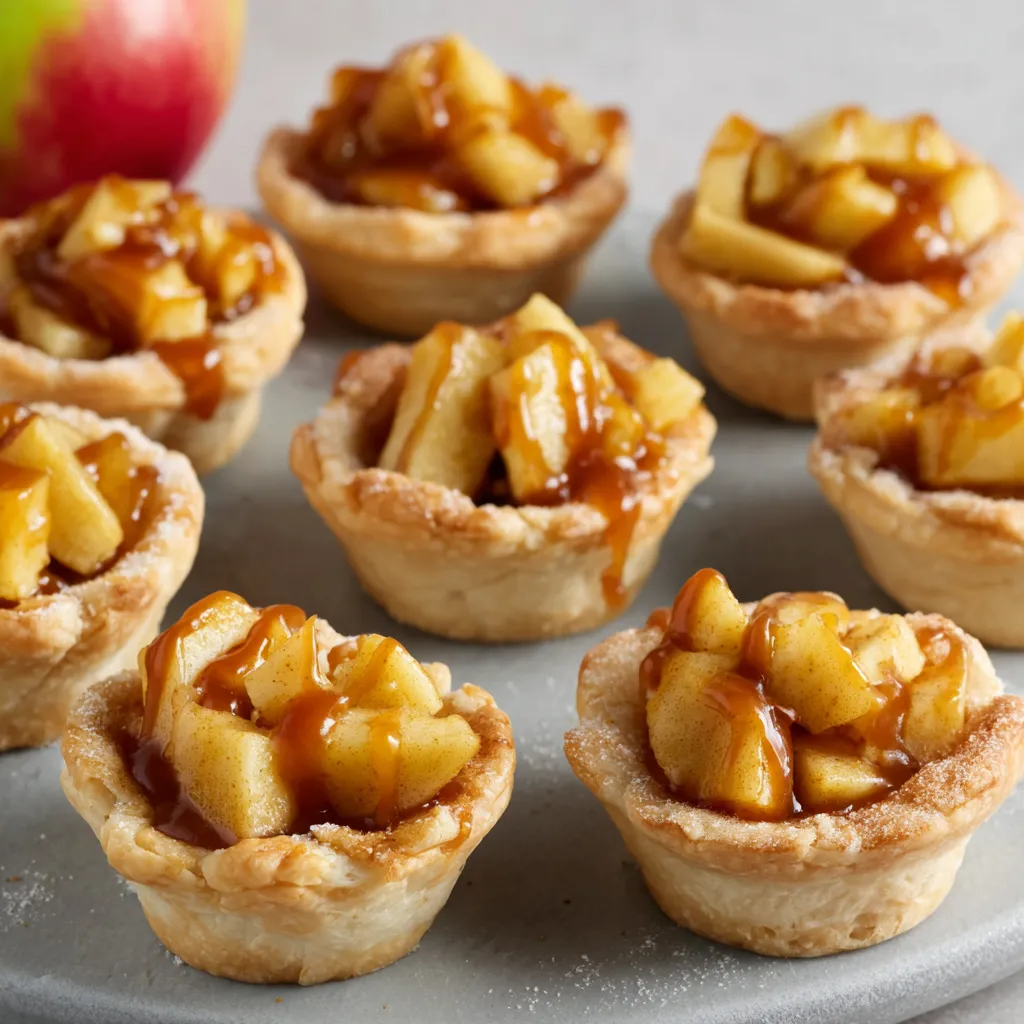
Caramel Apple Tartlets

Miniature caramel apple tartlets with crisp baked pastry shells filled with tender tart apples in a glossy caramel sauce — an easy, crowd-pleasing bite for any season.
This recipe for caramel apple tartlets has been a go-to in my kitchen ever since a rainy autumn afternoon when I wanted something small, sweet, and comforting to serve with coffee. I discovered this combination while testing quick fall desserts that used one sheet of refrigerated dough and pantry staples. The first time I served them, the house filled with the scent of butter and cinnamon and my family kept coming back to the plate. The contrast between the flaky, golden shell and the warm, slightly tangy apple filling finished with a glossy ribbon of caramel makes these tartlets feel special yet completely approachable.
I love how fast they come together. They are sturdy enough to transport to potlucks and elegant enough for a small dinner party. The texture is where this recipe shines: a delicate, crisp pastry shell that gives way to tender apple pieces suspended in a thick, saucy coating. The tartness of the apples counters the sweetness of the caramel so the result never tastes cloying. Over the years I have learned a few small tweaks that keep the crust crisp and the filling glossy, and I share those tips below so you get consistently great results.
Why You'll Love This Recipe
- Ready in under 45 minutes from start to finish, these bite-sized tartlets are ideal when you want a fast dessert that still looks homemade.
- Uses one sheet of refrigerated pie crust and simple pantry ingredients, so no special dough or long chilling time is required.
- Perfect for entertaining because they travel well and each tartlet is perfectly portioned for guests.
- Make-ahead friendly: the shells can be baked and stored while you prepare the filling, saving time on the day of serving.
- Balances sweet and tart flavors using tart apples and caramel topping, offering a sophisticated taste without complicated steps.
In my kitchen these tartlets have become the dessert I rely on when unexpected guests arrive. My kids love helping me cut the dough circles, and my partner always insists on a second for the extra caramel. They have also earned compliments at neighborhood potlucks because they look polished but are quick to assemble.
Ingredients
- Refrigerated pie crust: One sheet of store-bought crust keeps this recipe quick and consistent. Look for a butter-based crust for the best flavor, or use a vegan crust if you need to avoid dairy.
- Sugar and ground cinnamon: A tablespoon of sugar and a dash of cinnamon sprinkled into the shells before baking adds a caramelized top note to the crust.
- Butter: Two teaspoons of butter for sautéing the apples add depth and help the fruit soften without becoming mushy; use unsalted to control saltiness.
- Tart apples: Two cups diced, peeled tart apples such as Granny Smith or Cortland provide structure and bright acidity that complements the caramel.
- Sugar and caramel topping: Three tablespoons of granulated sugar plus three tablespoons of fat-free caramel ice cream topping create the sweet, glossy sauce—use your favorite brand for reliable results.
- All-purpose flour: Two tablespoons of flour acts as a thickener for the filling so the sauce clings to the apple pieces.
- Lemon juice and salt: Half a teaspoon of lemon juice brightens the filling and an eighth teaspoon of salt balances sweetness.
Instructions
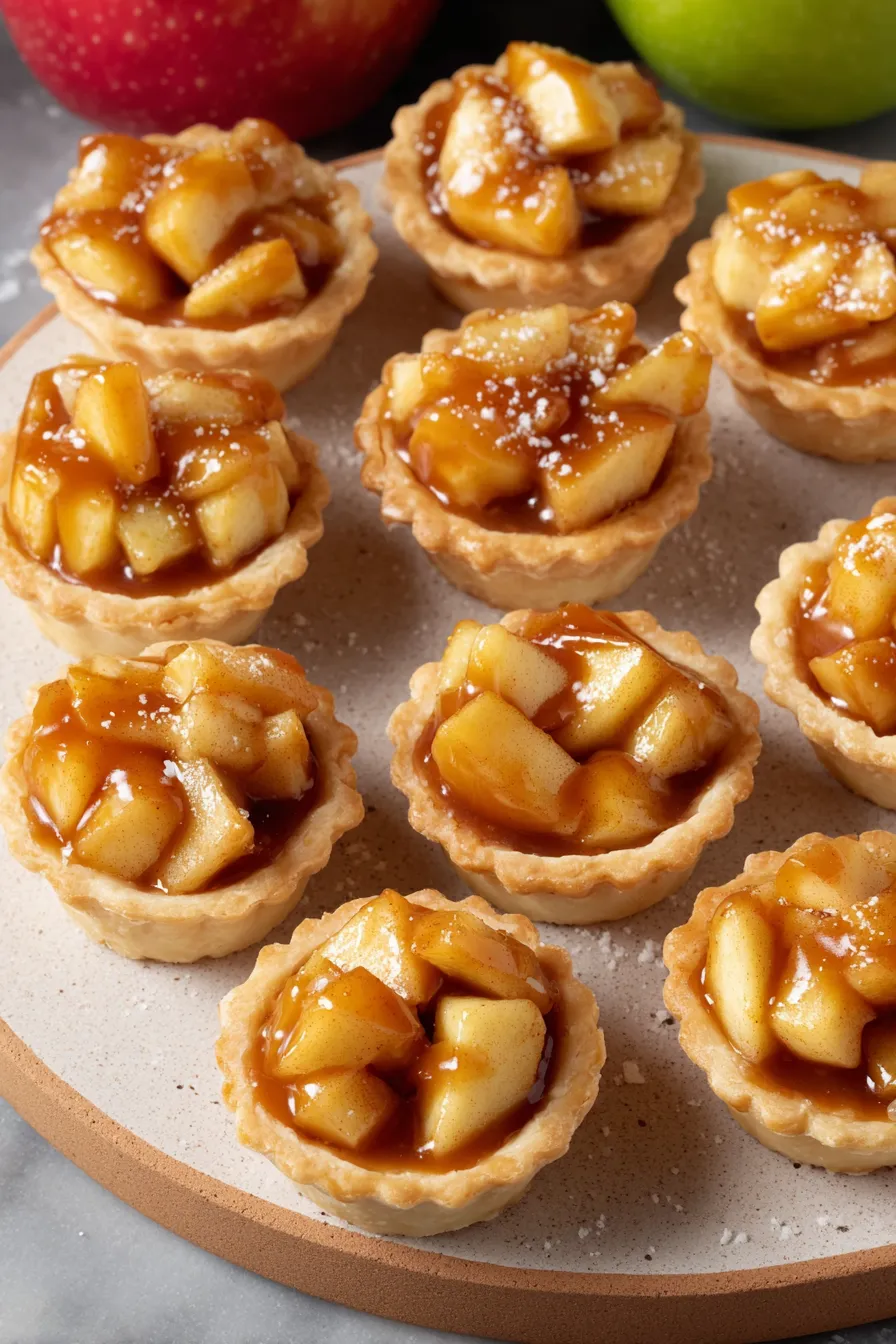
Prepare and cut the dough: Preheat the oven to 350 degrees Fahrenheit. On a lightly floured surface, roll out the refrigerated dough just enough to smooth seams. Use a two and a half inch round cutter to cut twenty circles. Press each circle gently into the bottom and up the sides of miniature muffin cups that have been coated with cooking spray. Prick the bottoms of each shell a few times with a fork so steam can escape, then spray the exposed dough lightly with cooking spray and sprinkle each with a mixture of one tablespoon sugar and a dash of ground cinnamon. Bake the shells: Bake the tart shells in the preheated oven until golden brown, about six to eight minutes. Watch closely so the edges do not burn. When they are lightly golden, remove the pan from the oven and let the shells cool in the pan for five minutes before transferring them to a wire rack to cool completely. Cooling on a rack prevents the bottoms from steaming and becoming soft. Cook the apple filling: In a large saucepan over medium heat, melt two teaspoons of butter. Add two cups of peeled, diced tart apples and cook, stirring, until the apples are crisp-tender, about four to five minutes. Add three tablespoons sugar, three tablespoons fat-free caramel ice cream topping, two tablespoons all-purpose flour, half a teaspoon ground cinnamon, half a teaspoon lemon juice and an eighth teaspoon salt. Stir to combine, then bring the mixture to a gentle boil and cook until the sauce thickens and the apples are tender, roughly two minutes. The flour will give the sauce body; cook just long enough so the apples hold their shape. Assemble and cool: Remove the saucepan from heat and let the filling cool for about five minutes. Spoon a small mound of filling into each cooled tart shell. If you prefer a glossy finish, drizzle a bit of extra caramel topping over the filled tartlets. Allow the tartlets to rest until the filling sets slightly before serving.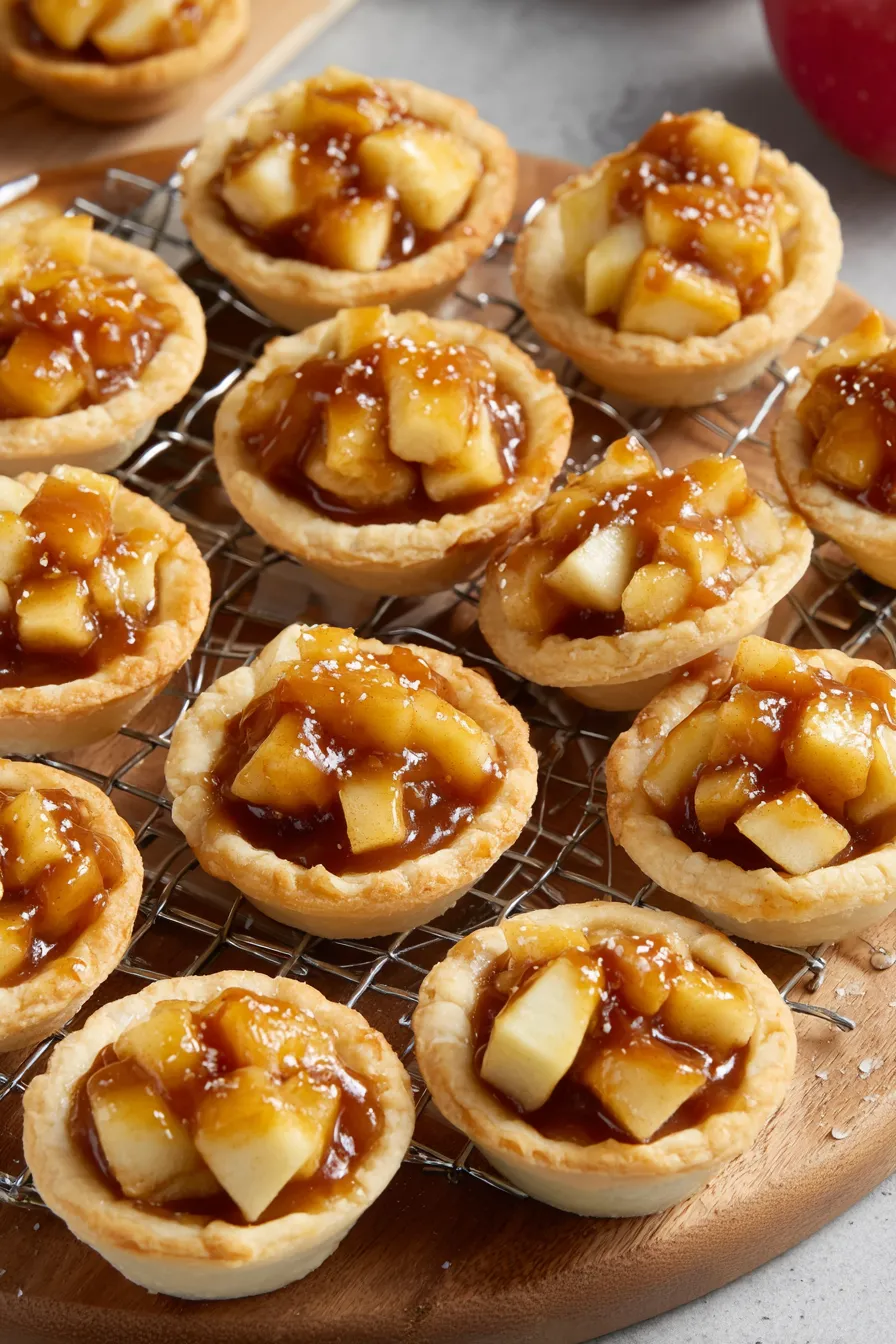
You Must Know
- These tartlets freeze well for up to three months if you freeze the baked shells separately and add fresh filling when serving.
- Use tart apples for texture and brightness; sweeter varieties will yield a much sweeter filling that may be cloying with the caramel.
- Store finished tartlets in the refrigerator for up to two days, but bring to room temperature before serving for best texture.
- This makes twenty tartlets; plan one to two per person depending on appetite and whether other desserts are offered.
My favorite part is the balance of textures. I remember taking these to a small gathering and watching friends debate whether to eat them warm or chilled. People who prefer less sweetness appreciated the slight tang from the apples, and those who love caramel kept returning for another. Little experiments like adding toasted pecans taught me how a small change can transform the experience.
Storage Tips
Store baked shells separately in an airtight container at room temperature for up to two days to keep them crisp. If you need longer storage, freeze shells in a single layer on a baking sheet until firm, then transfer to a resealable freezer bag for up to three months. For the filling, refrigerate in an airtight container for up to three days. When ready to serve, reheat the filling gently in a saucepan, spoon into shells and allow to set for a few minutes. If making ahead for a party, assemble the tartlets no more than a few hours in advance to prevent the shells from becoming soggy.
Ingredient Substitutions
If you need to avoid dairy, choose a plant-based pie crust and substitute a vegan butter for sautéing. For gluten-free needs, use a certified gluten-free refrigerated crust and a gluten-free flour or cornstarch as the thickener in the filling; use one tablespoon cornstarch mixed with one tablespoon cold water instead of two tablespoons flour. If you cannot find fat-free caramel topping, a small amount of heavy cream and brown sugar simmered until syrupy will work, though it will be richer. For a nuttier flavor, fold in a tablespoon of finely chopped toasted pecans at the end.
Serving Suggestions
Serve these tartlets warm with a small scoop of vanilla ice cream or a dollop of lightly whipped cream. For an elegant touch, dust lightly with powdered sugar or drizzle warmed caramel sauce. Pair with black coffee or a sparkling apple cider for a seasonally appropriate beverage. They also make a lovely accompaniment to a cheese board where the sweet apple and caramel notes contrast with savory cheeses.
Cultural Background
Small fruit-filled pastries have a long history in many culinary traditions where portable, single-serve pies are valued. These miniature tartlets riff on classic apple pie flavors and the American love of caramel-apple combinations that became popular as confectioners paired tart apples with caramel to counterbalance sweetness. This bite-sized version keeps the spirit of those fall treats while offering a modern, quick take for busy cooks.
Seasonal Adaptations
In autumn, use a mix of apple varieties for a layered flavor. For winter gatherings, fold in a pinch of nutmeg and swap in pear pieces for a softer, sweeter filling. In summer, try a lighter version with fresh peaches and a drizzle of honey instead of caramel. For holiday parties, add a few chopped, toasted pecans and a splash of bourbon to the filling for warmth and depth.
Meal Prep Tips
To streamline prep, bake the shells a day ahead and store them in an airtight container. Cook the filling the morning of your event and keep it refrigerated; gently reheat and spoon into shells just before guests arrive. Pack tartlets in shallow containers with parchment layers if transporting, and place them at room temperature upon arrival for the best texture.
These caramel apple tartlets are small in size but big in comfort. They are a reliable choice when you want something that feels homemade with minimal fuss. I encourage you to make a double batch to keep some for snacking and to experiment with add-ins like nuts or a pinch of cardamom.
Pro Tips
Use tart apples such as Granny Smith for structure and balanced acidity against the caramel.
Bake shells until just golden and cool on a wire rack to prevent steam from softening the bottoms.
Keep the filling simmering gently and avoid overcooking the apples to maintain tender pieces that hold their shape.
If you need thicker filling, add an extra 1 teaspoon of flour or a slurry of 1 teaspoon cornstarch mixed with 1 tablespoon cold water and boil briefly.
For extra crunch, sprinkle toasted chopped pecans on top just before serving.
This nourishing caramel apple tartlets recipe is sure to be a staple in your kitchen. Enjoy every moist, high protein slice — it is perfect for breakfast or as a wholesome snack any time.
FAQs about Recipes
Can I prepare the shells ahead of time?
Yes. You can bake the shells ahead and store them at room temperature for up to two days in an airtight container. Fill them shortly before serving to avoid soggy bottoms.
Can these be frozen?
Yes. Freeze baked shells separately on a baking sheet, then transfer to a freezer bag for up to three months. Thaw at room temperature and fill with freshly reheated filling.
Tags
Caramel Apple Tartlets
This Caramel Apple Tartlets recipe makes perfectly juicy, tender, and flavorful steak every time! Serve with potatoes and a side salad for an unforgettable dinner in under 30 minutes.
Ingredients
Crust
Filling
Instructions
Prepare and cut the dough
Preheat oven to 350 degrees Fahrenheit. Roll out the refrigerated crust on a lightly floured surface and cut twenty 2 1/2 inch circles. Press each circle into a mini muffin cup sprayed with cooking spray, prick with a fork, then spray lightly and sprinkle with sugar and cinnamon.
Bake shells
Bake the shells until golden brown, about six to eight minutes. Cool in pan for five minutes then transfer to a wire rack to cool completely to prevent sogginess.
Cook the filling
Melt butter in a large saucepan, add diced apples and cook until crisp-tender, 4 to 5 minutes. Stir in sugar, caramel topping, flour, cinnamon, lemon juice and salt, bring to a gentle boil and cook until thickened, about 2 minutes. Remove from heat and cool five minutes.
Assemble and serve
Spoon cooled filling into baked shells, drizzle additional caramel if desired and let set briefly. Serve warm or at room temperature.
Last Step: Please leave a rating and comment letting us know how you liked this recipe! This helps our business to thrive and continue providing free, high-quality recipes for you.
Nutrition
Did You Make This?
Leave a comment & rating below or tag
@cravele on social media!
Categories:
You might also like...

Fudgy Marshmallow Brownies
Ultra-fudgy brownies studded with chocolate chunks, crowned with gooey marshmallows and a quick cocoa icing for irresistible, crowd-pleasing decadence.

Buttery Pecan Pie Bars
Buttery shortbread crust topped with a gooey brown sugar pecan filling. Easy, crunchy, and truly irresistible with just 10 minutes of prep.

Silky No-Crack Pumpkin Cheesecake
Silky pumpkin cheesecake with a spiced graham crust, no cracks, effortless mixing, and decadent caramel and rum whipped cream for unforgettable holiday celebrations.
Did You Make This?
Leave a comment & rating below or tag @cravele on social media!
Rate This Recipe
Share This Recipe
Enjoyed this recipe? Share it with friends and family, and don't forget to leave a review!
Comments (1)
This recipe looks amazing! Can't wait to try it.
Comments are stored locally in your browser. Server comments are displayed alongside your local comments.

Hi, I'm Emily!
What's Popular

30-Minute Meals!
Join to receive our email series which contains a round-up of some of our quick and easy family favorite recipes.